
You know that feeling you get when you finally finish something you've been putting off for a long time? I've been basking in that feeling all day :) Actually, I haven't even been working on it THAT long, it just feels that way. Think back to when I went out of town about 2.5 weeks ago. I mentioned that I had stopped at IKEA in Houston on my way back home. What I didn't mention was that I had an idea brewing for some new living room seating and had purposely stopped there to pick up the pieces I needed to build it.
It all started when I was looking around my living room about 2 months back, thinking I wanted more seating and storage. I had a glider in the corner that was driving me bananas. No one sat in it except Sarge. Whenever someone did sit in it and rock, it was apparently hitting the wall because I noticed bald spots where it had scraped off paint...not cool. So it was time to change things up. Initially I wanted a settee...something similar to these:
$1369

$999

Ummmm, yeah, they're beautiful but I would never pay that much for a mini couch. No way Jose!
If I couldn't have something for that corner, then I thought the next best thing would be a window bench. Only one problem...I don't have a table saw or the type of skills necessary to build something like that.
Here's where Pinterest came in and changed everything.
I found that a lot of people were hacking IKEA Expedit bookcases and turning them into benches by simply adding mdf, foam, and fabric. It sounded simple and affordable. Seeing as how everybody and their momma has jumped on the expedit bandwagon, I thought I would go ahead and do the same. Here are some of the photos from Pinterest that inspired me:


Aren't they all just lovely? That very first one from a nursery just made my heart skip a beat. There are so many more I could show you, but that would take forever. I think you get the point, it's a very popular idea and I've also seen it done with the Ikea Lack bookcase.
I knew I didn't want to take the time to sew a cushion for it because I'm in the middle of sewing a ton of pillow covers and altering some curtain panels as well as my Halloween costume. I also didn't want to leave it bare because it wouldn't be very comfortable, so I went the upholstery route. Before buying anything, I went online to check the dimensions and I measured the area under my window just to be sure it would all work.
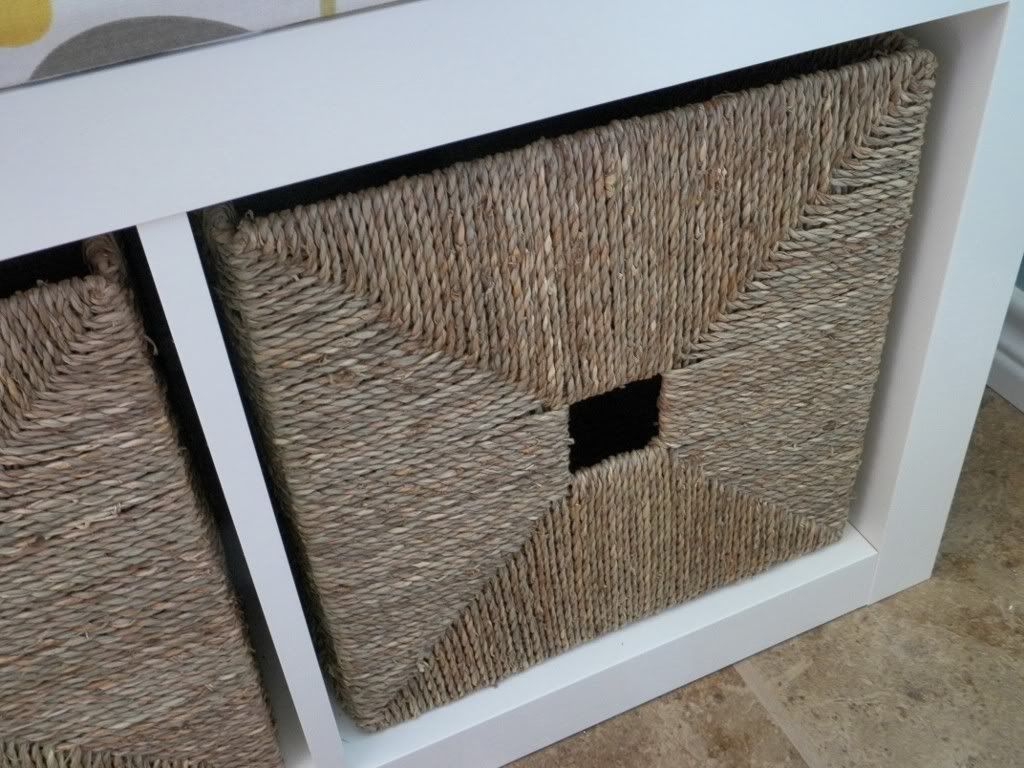
Once we were at Ikea, Eva and I took our time shopping around. We found some great items, including the lanterns I used for my front porch, among many other things. You'll see stuff popping up in the next couple blog posts. Here we are looking at basket options for the expedit:
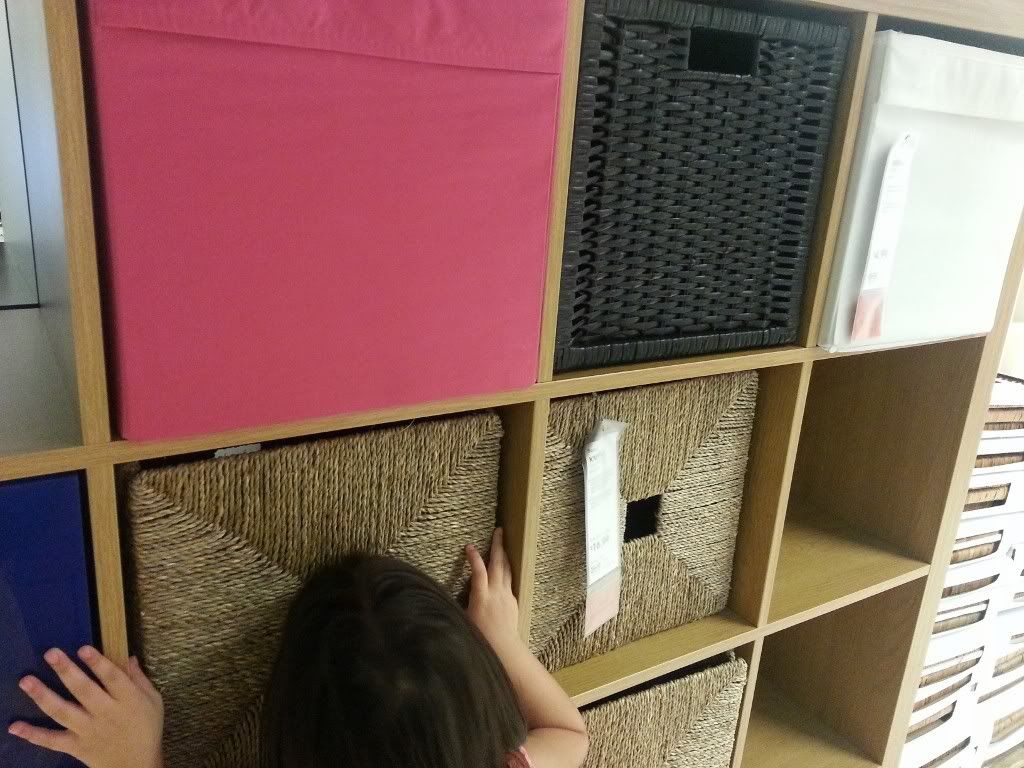
We went with the one in the middle, called the Knipsa.
I can't tell you just how excited I was to get home and work on it.
So excited that after driving to San Antonio from Houston, I opened the box and got right to it.

It's so simple to put together. You line up dowels for the sides and screw in the endcaps.
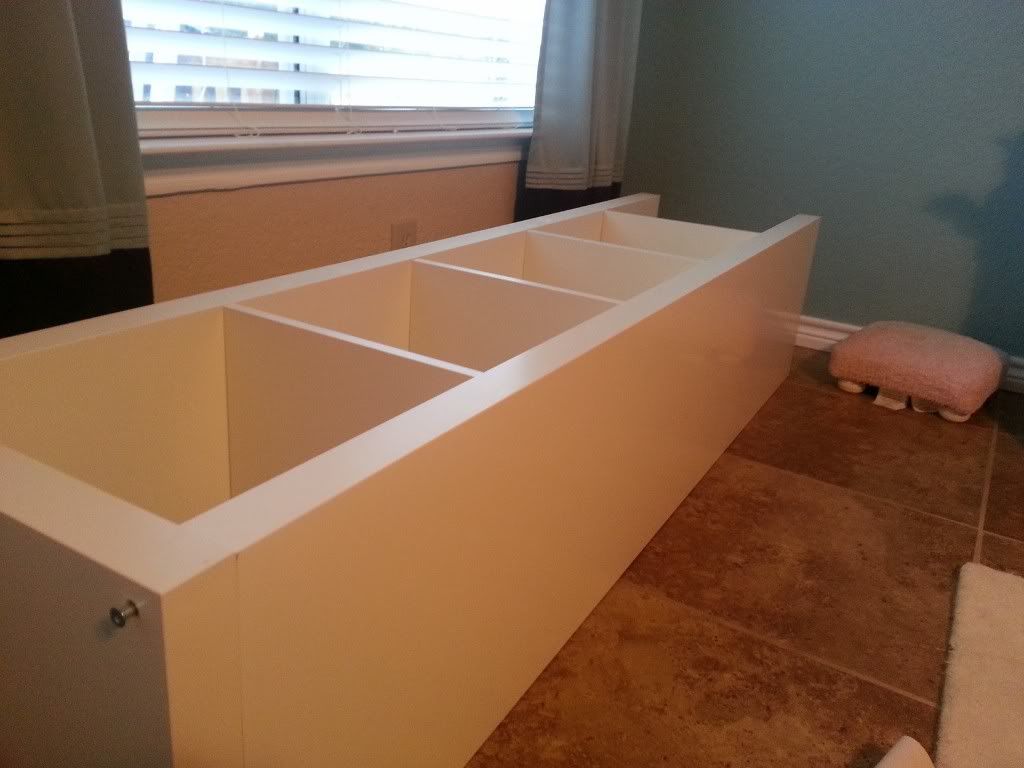
Here it is once I was done putting it together:
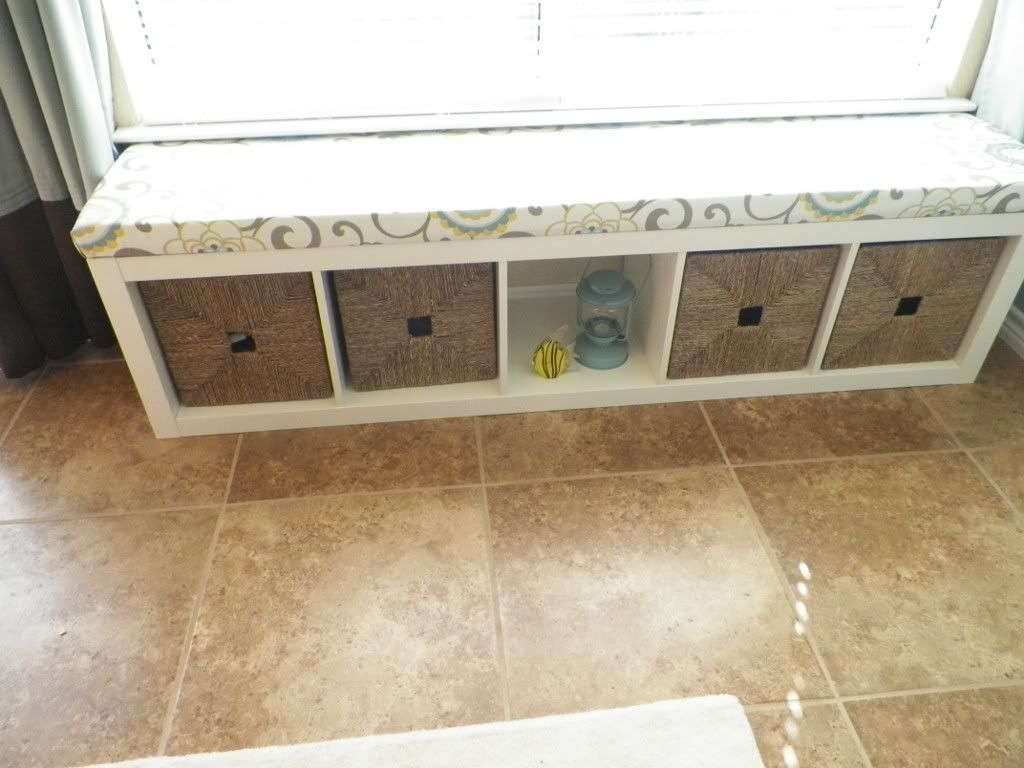
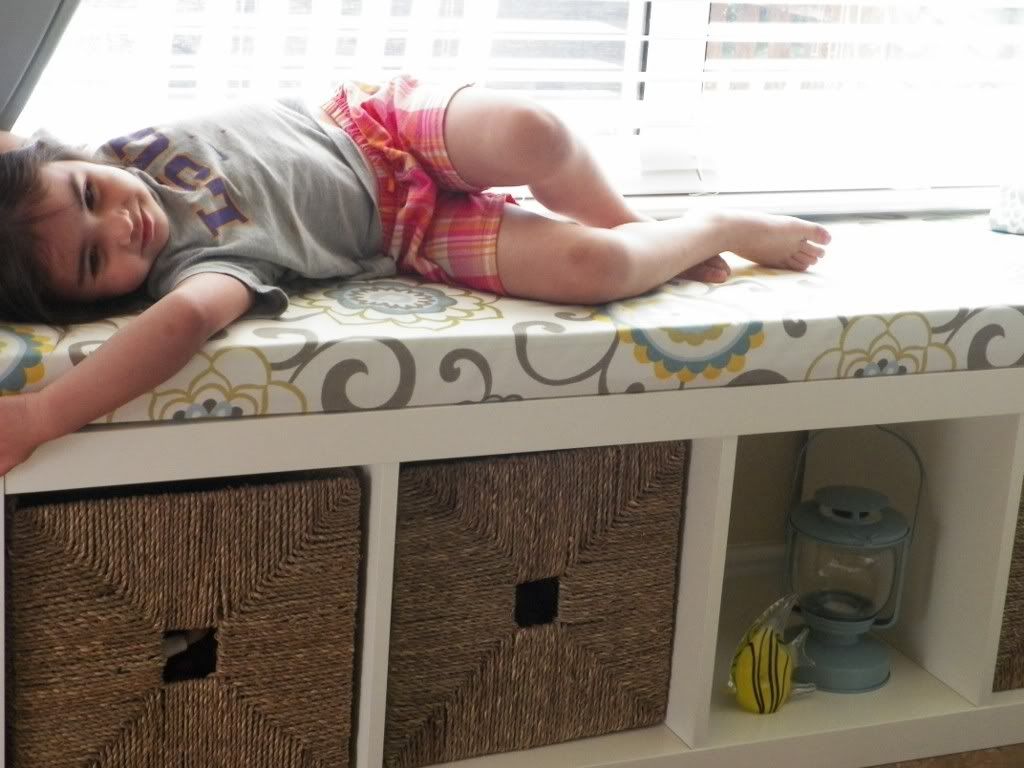
My brain wasn't functioning because I bought 4 baskets instead of 5, doi! Since the nearest Ikea is about 1.5 hrs away, I decided to just decorate the middle cube and pretend like it was done intentionally.
The next day it was time to buy the MDF and foam for the seat. I called a few places to price out foam because it's actually pretty pricey. Hobby Lobby had some foam squares but that wouldn't work. Joann's had 2" foam by the yard, but it was something like $32/yd. I don't think so, homey don't play that, lol! That would have been really expensive since you need a little over two yards for one bench. My next call was to Hancock Fabrics, and wouldn't you know it, they had 2" foam on sale for $18/yd. I was like, score! Even if you can't get it on sale, the original price there is $26/yd, which is still cheaper than Joann's.
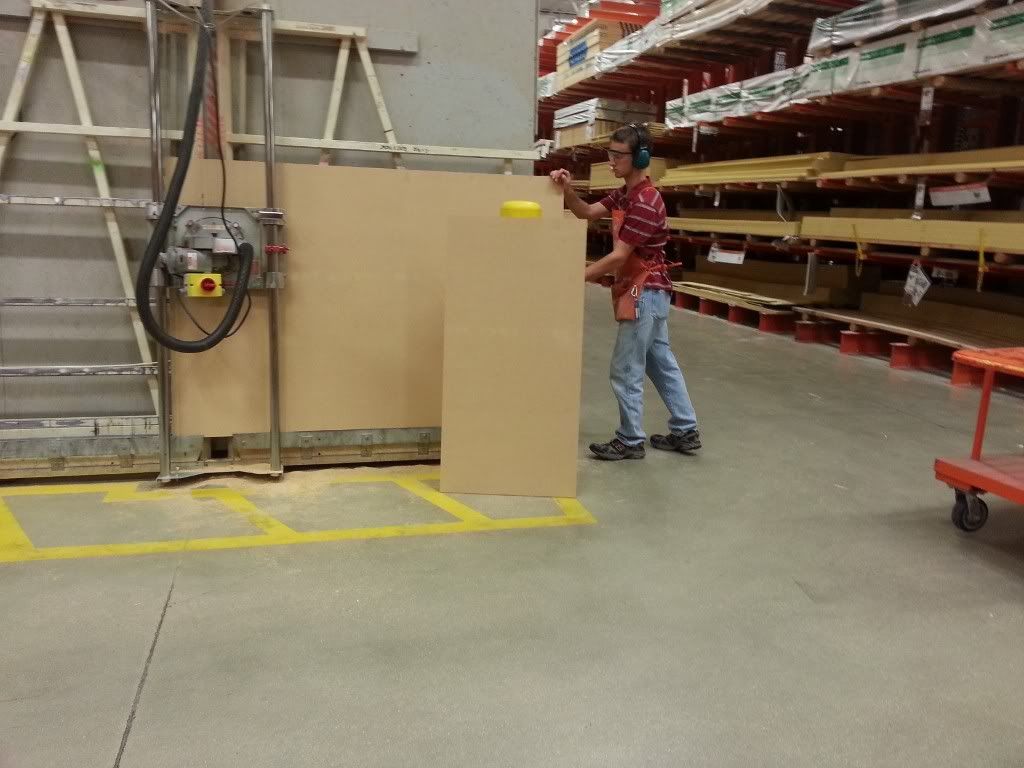
Next stop was Home Depot for MDF. Unfortunately I was told you can't have them cut down a large piece and only pay for what you need. You have to buy it by the sheet. The good thing is you will have extra wood to use on other projects. I think I paid $28 for a sheet, then the nice guy in their wood department cut it down to my dimensions. In case you're interested in building one yourself, the dimensions I used are 72 9/16" x 15 5/16."
He cut it just perfectly because it was exact. Yes, I secretly took a pic while pretending to text on my phone, teeheehee!
Here's my car loaded down with the foam, fabric, and MDF, as well as other goodies for different projects:
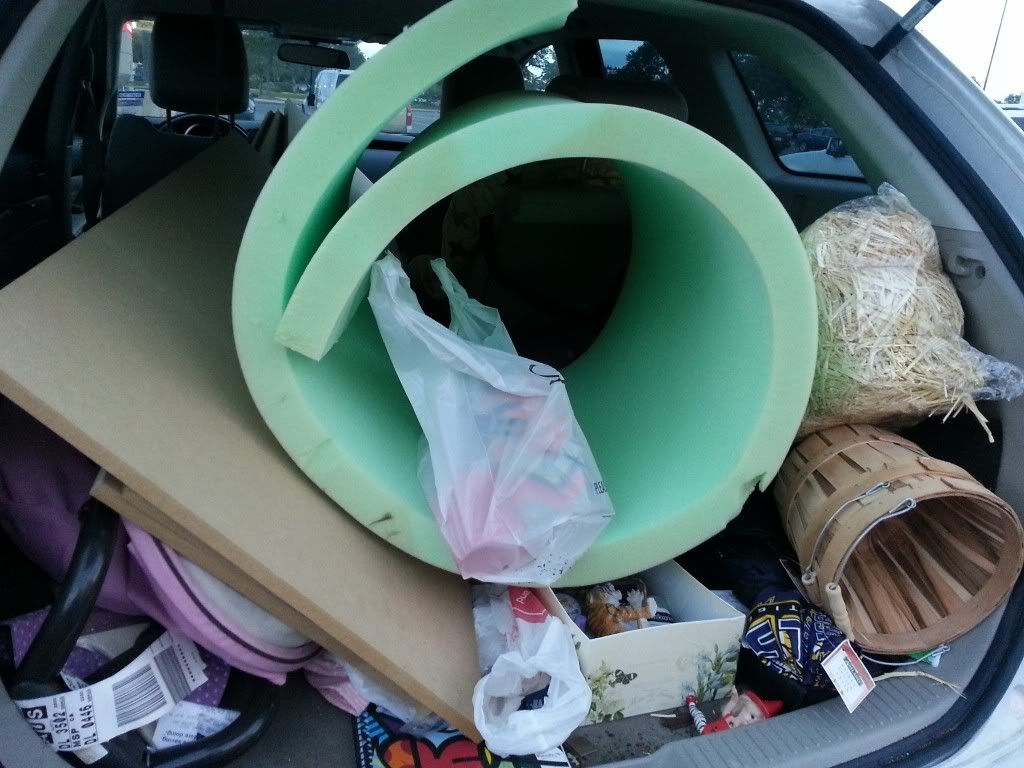
I guess I should have called this blog chaos in my casa & car!
When I got home I laid it all out:
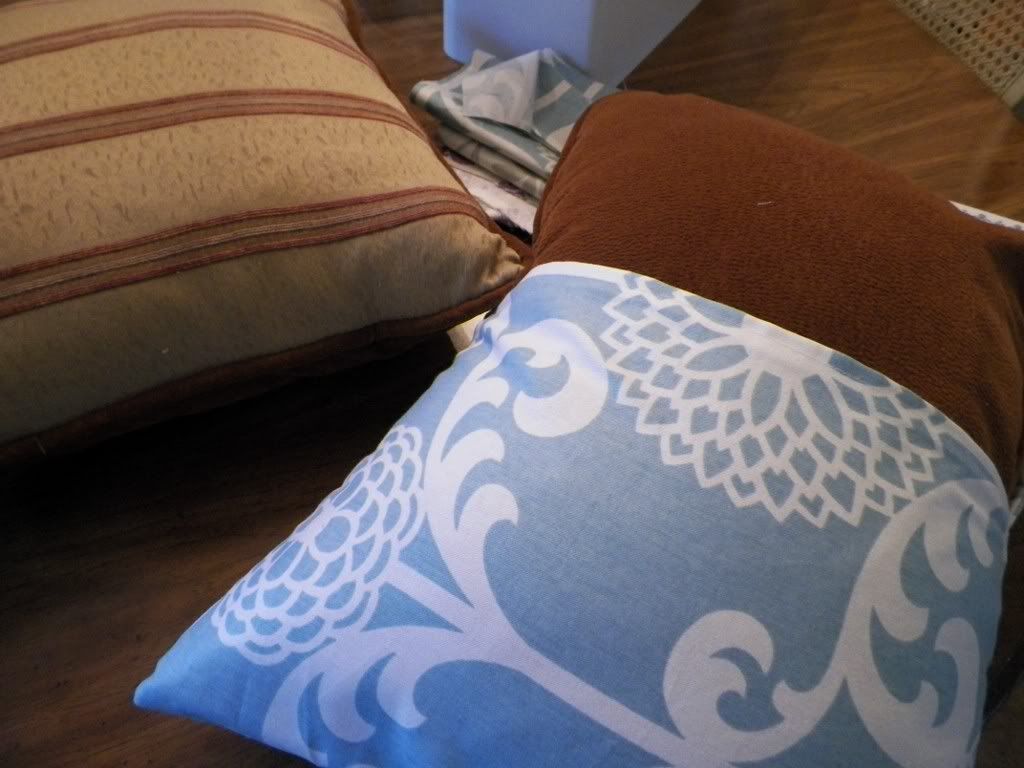
and that's how it stayed for 2 weeks while I worked on other projects, including sewing pillow covers for the bench, again using the envelope pillow method:
(good way to use old pillows)
I know, I know, two weeks with it like that! Why? I think part of me was afraid to mess it up, since I had invested about $200 total in the expedit ($60), mdf ($28), foam ($38), baskets ($64), and fabric ($22).
I was also keeping busy with other projects. Then yesterday I got tired of looking at the mess. It was time to get busy. First thing I did was lay it out the way it would go together, expedit topped by mdf, then the foam:

Next, I used my electric knife to cut the foam. I have a cheap $10 knife from Walmart.
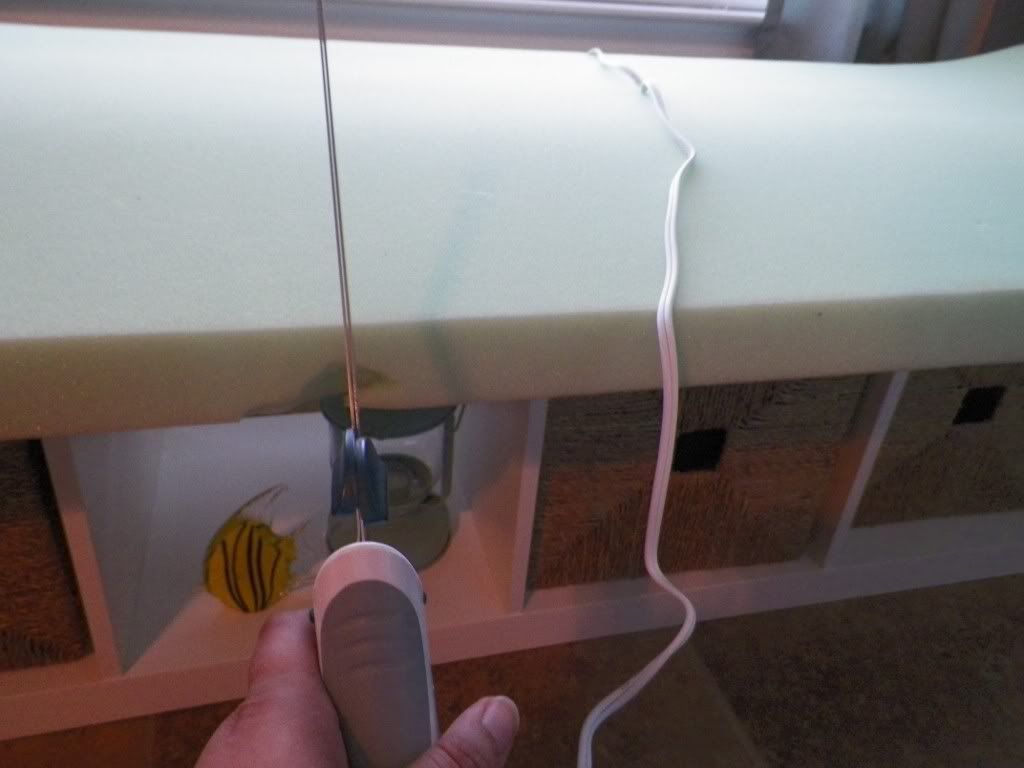
The employee at Hancock Fabrics had cut it to 72 9/16" for me, so it was the right length, but the width wasn't cut, so I started cutting out the excess in chunks.
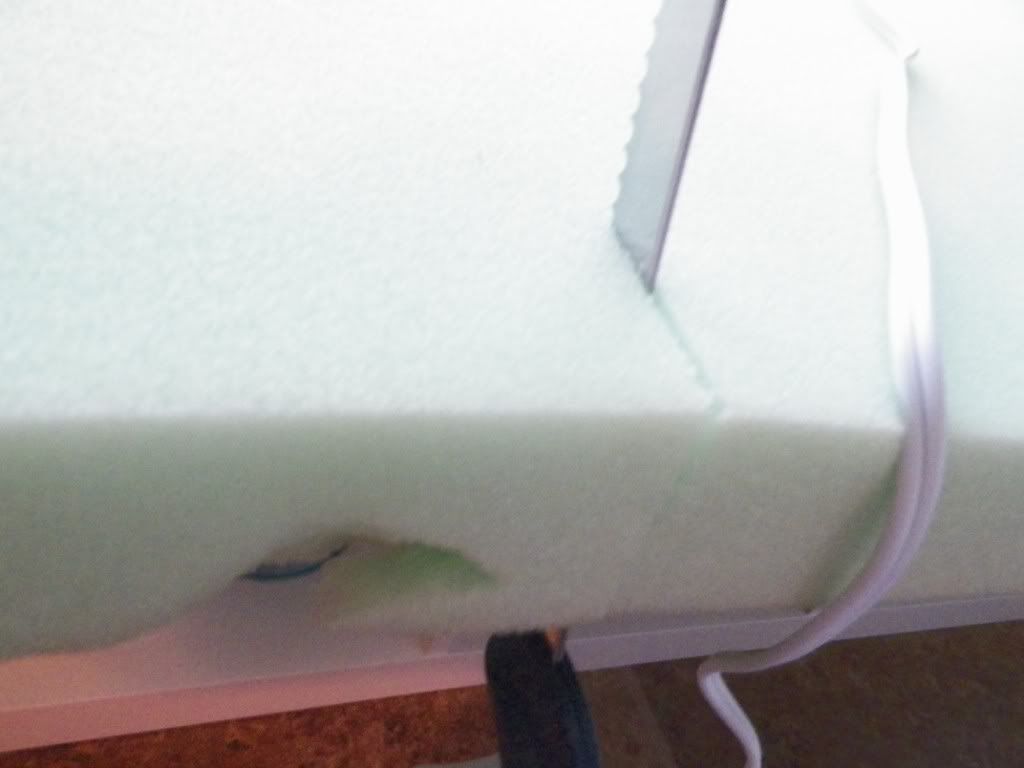

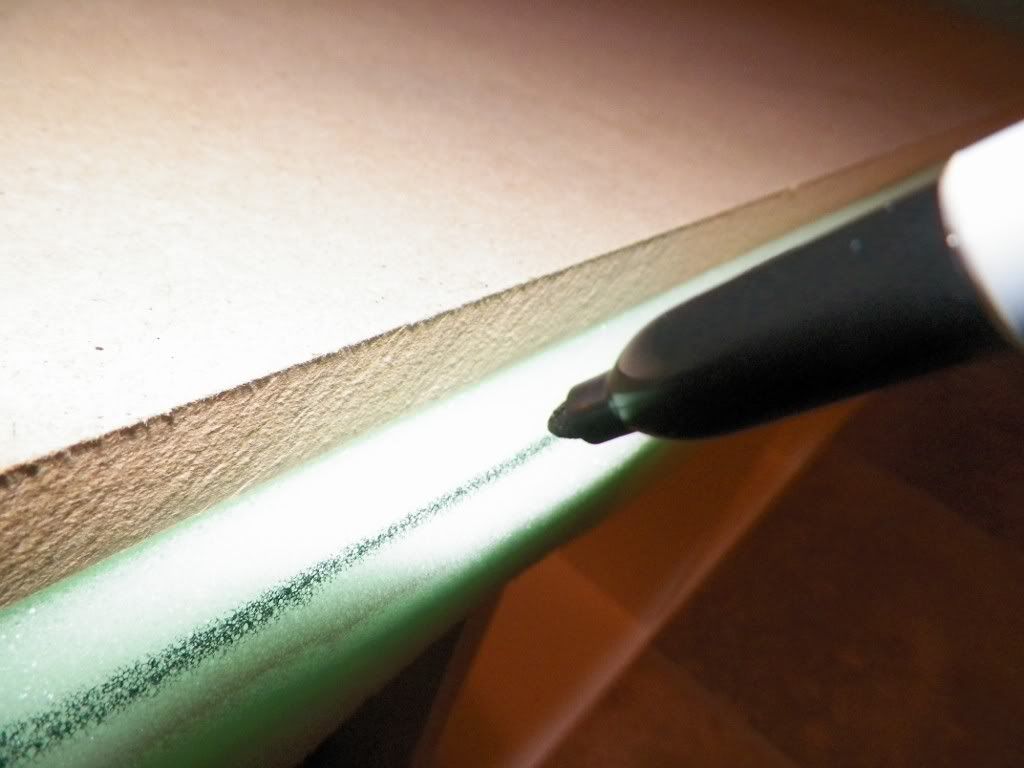
I'm straight line challenged so I don't know why I tried free handing it. I couldn't get it perfectly straight, so I took my sharpie and used it to draw out a straight line for me to follow:
Don't worry if you accidentally cut a little too much. You can always use hot glue to put the piece back...yes I'm speaking from experience, lol.
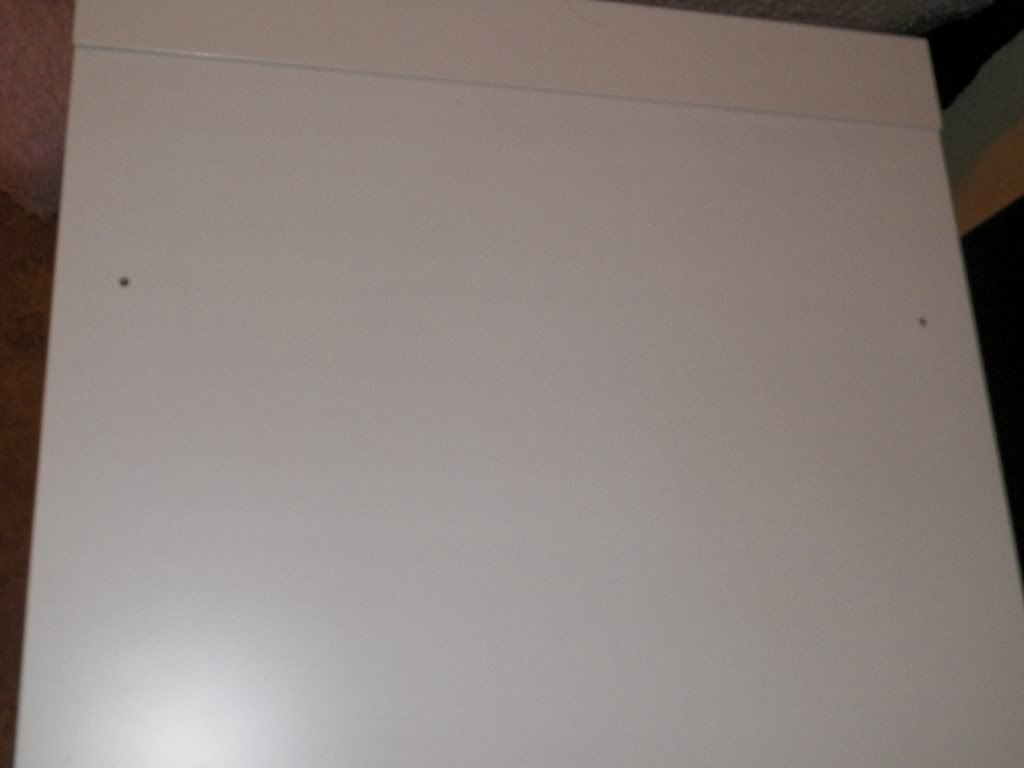
Once the foam was cut, I pre-drilled holes through the mdf and straight down into the expedit. I did this because I wanted to screw the cushion to the expedit. I didn't want it sliding and falling on someone's foot, that would be painful, and yes, I'm once again speaking from experience. I dropped it on my big toe and ouchy it hurt! Now stop laughing.
Here are the marks I made before drilling:

Then I drilled straight through:

2 on each end:
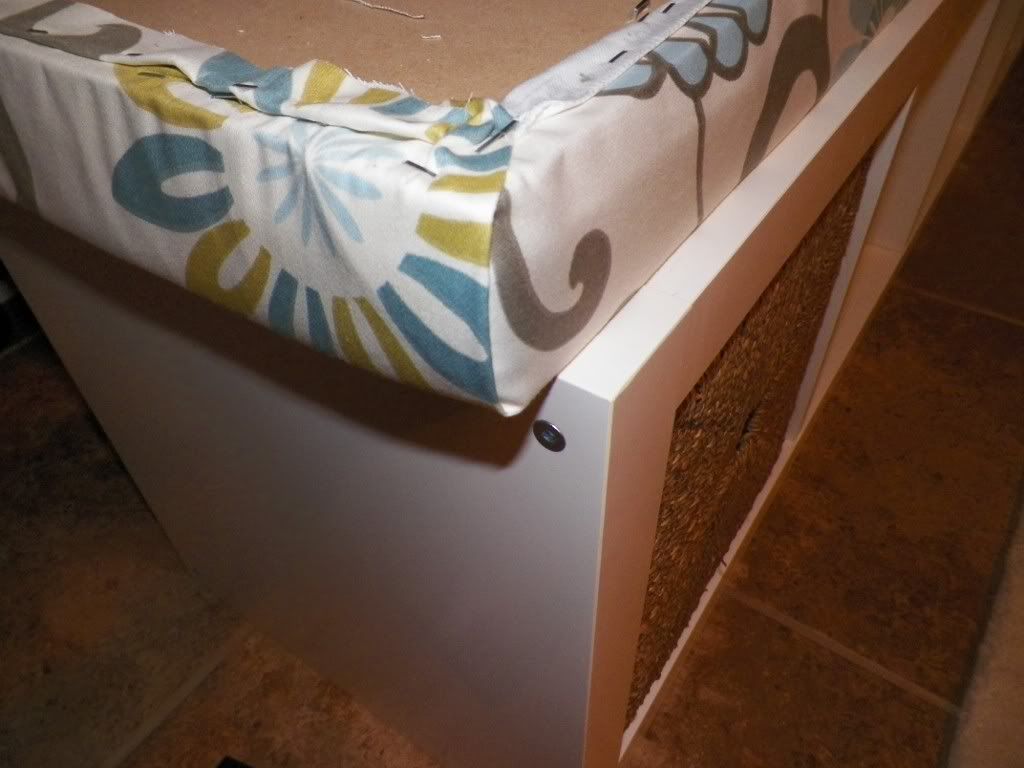
I had already cut and ironed my fabric. I chose Waverly's Pom Pom Play in the Spa color. It was on sale for $10/yd at Joann's. I laid the ironed fabric face down, topped it with the MDF and foam, making sure to keep the pattern straight:
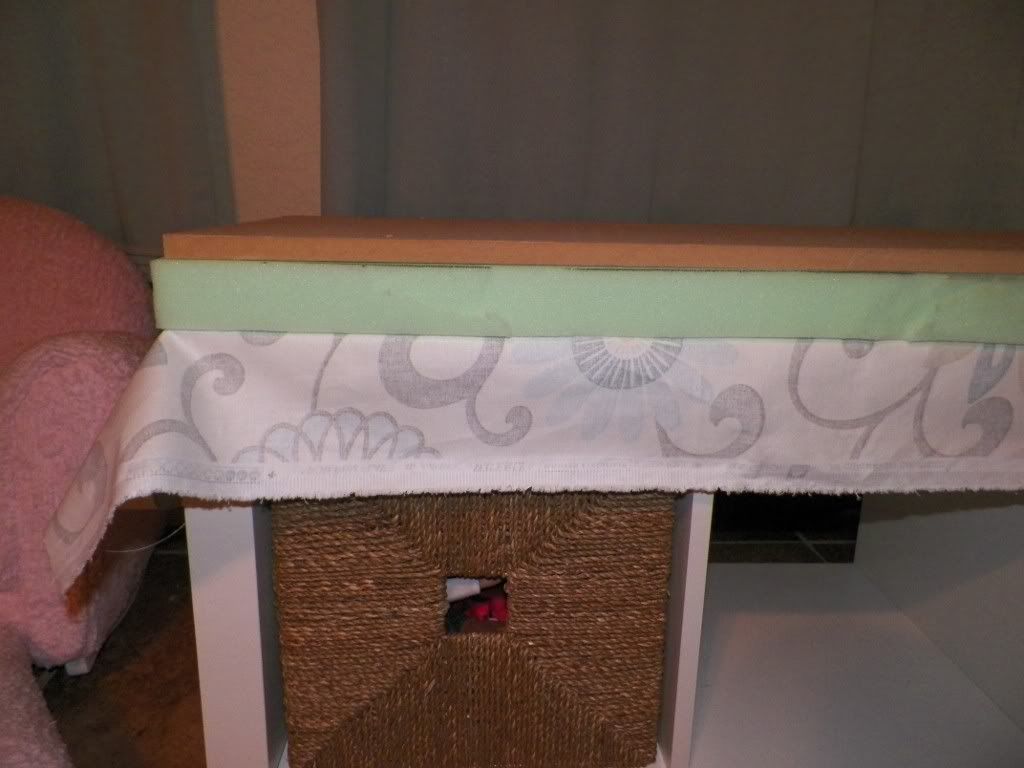

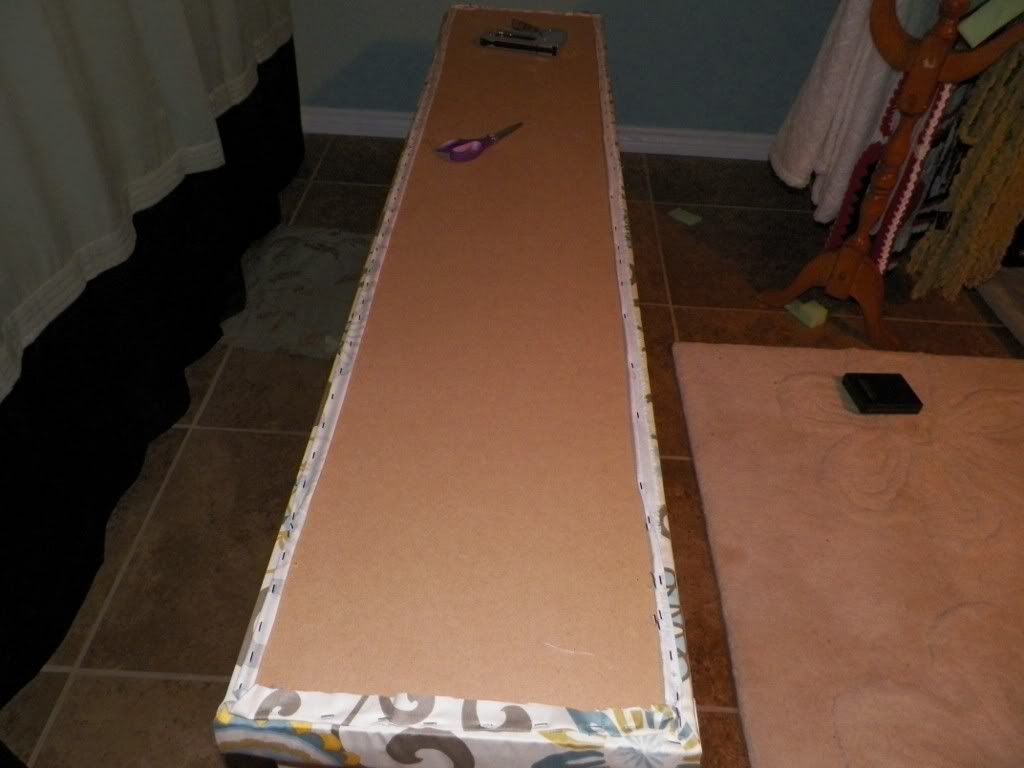
Then I stapled the fabric to the MDF, pulling it tightly and folding it as I went along:
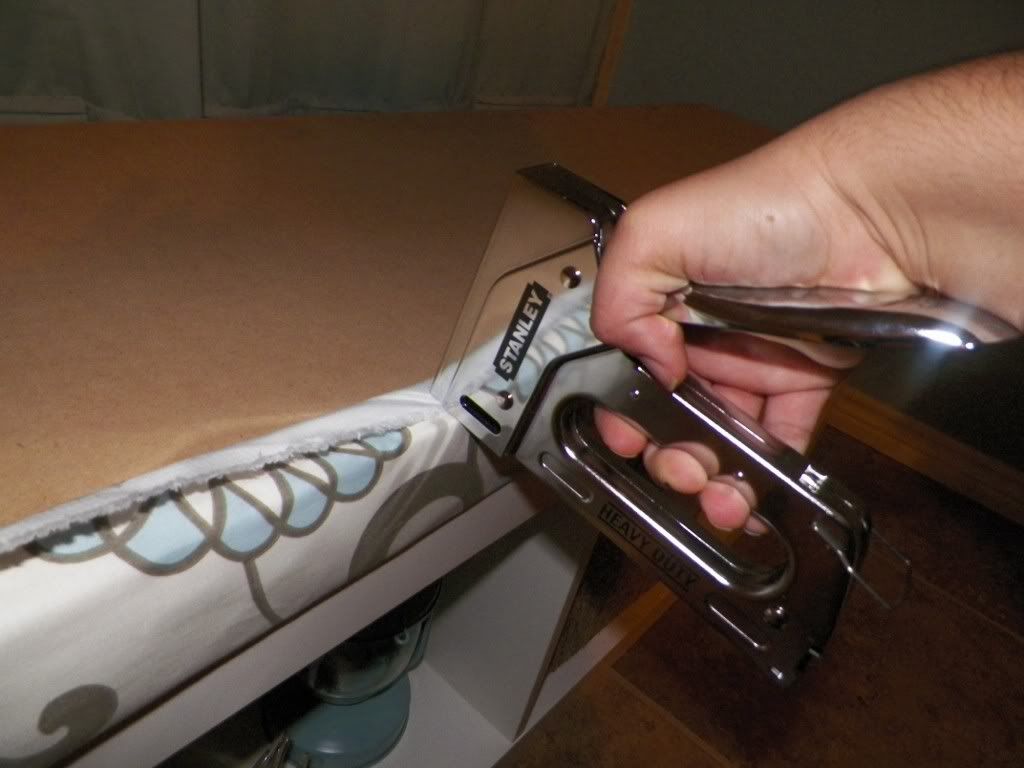

Finito!
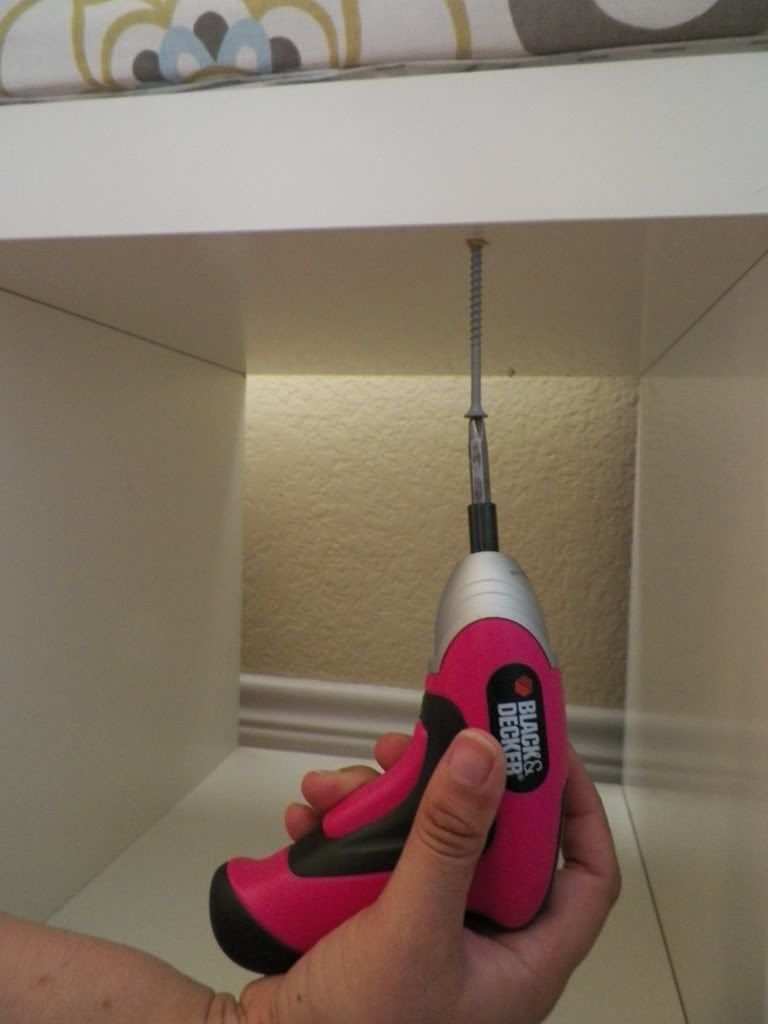
Then I turned it over, straightened it out, and screwed it down using some 3" screws I had in my tool box:

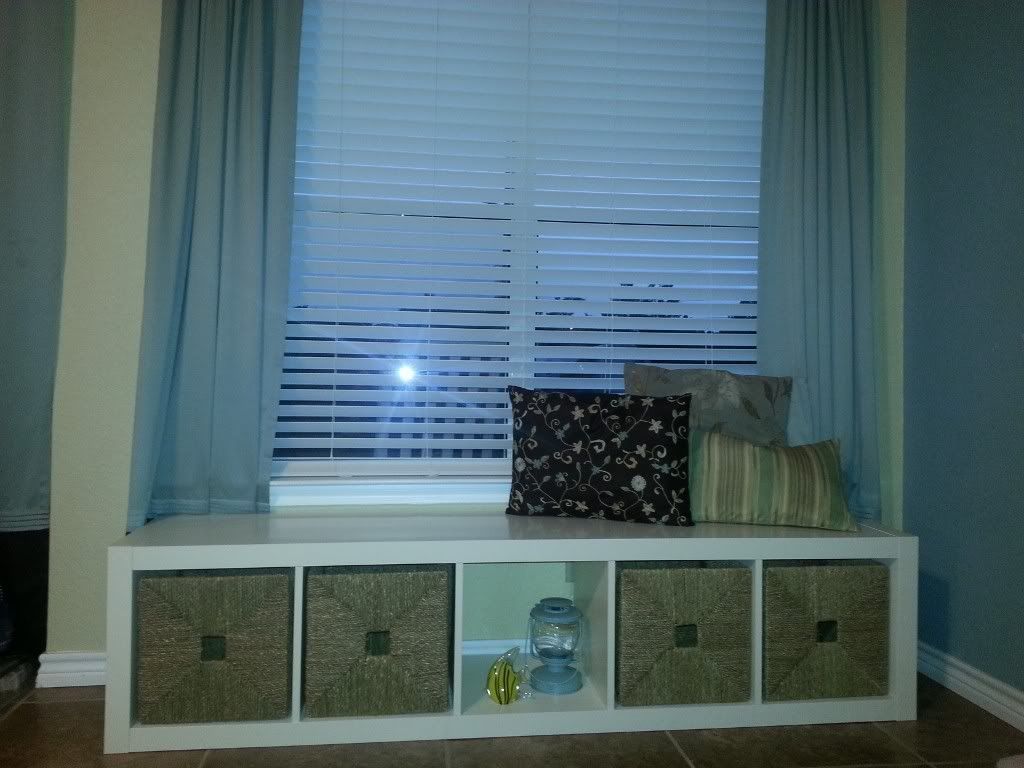
Then I just tossed on the pillows I had sewn for it, and hooray, it was complete!
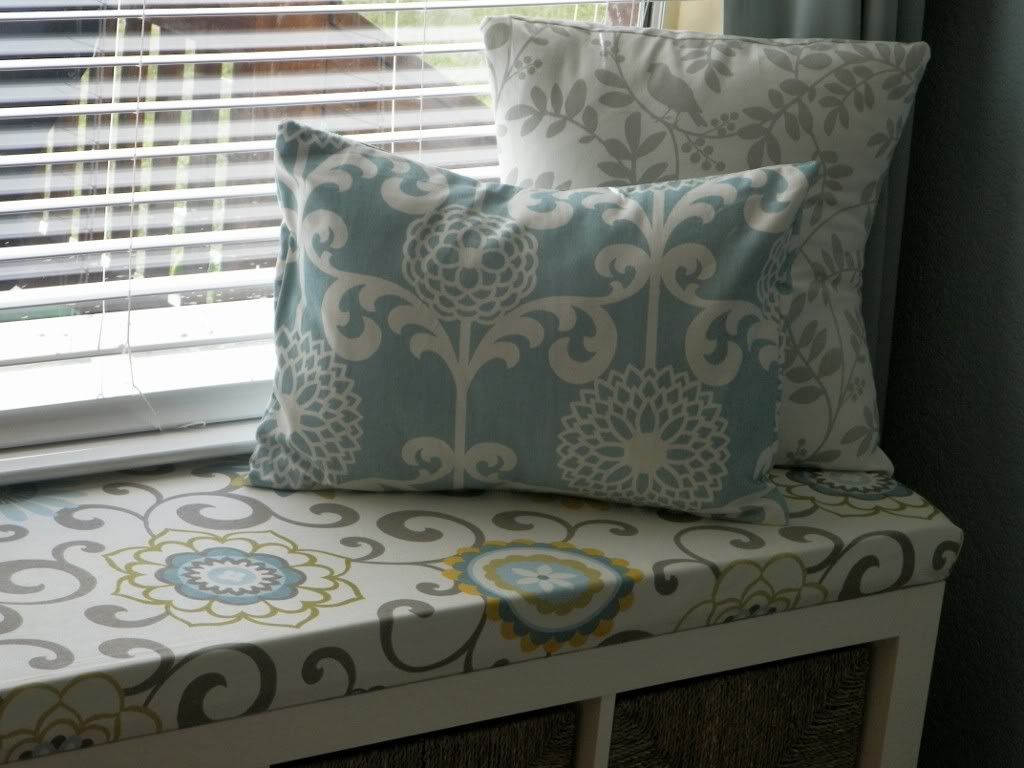

(blue lantern is Ikea $4, in case you're wondering)
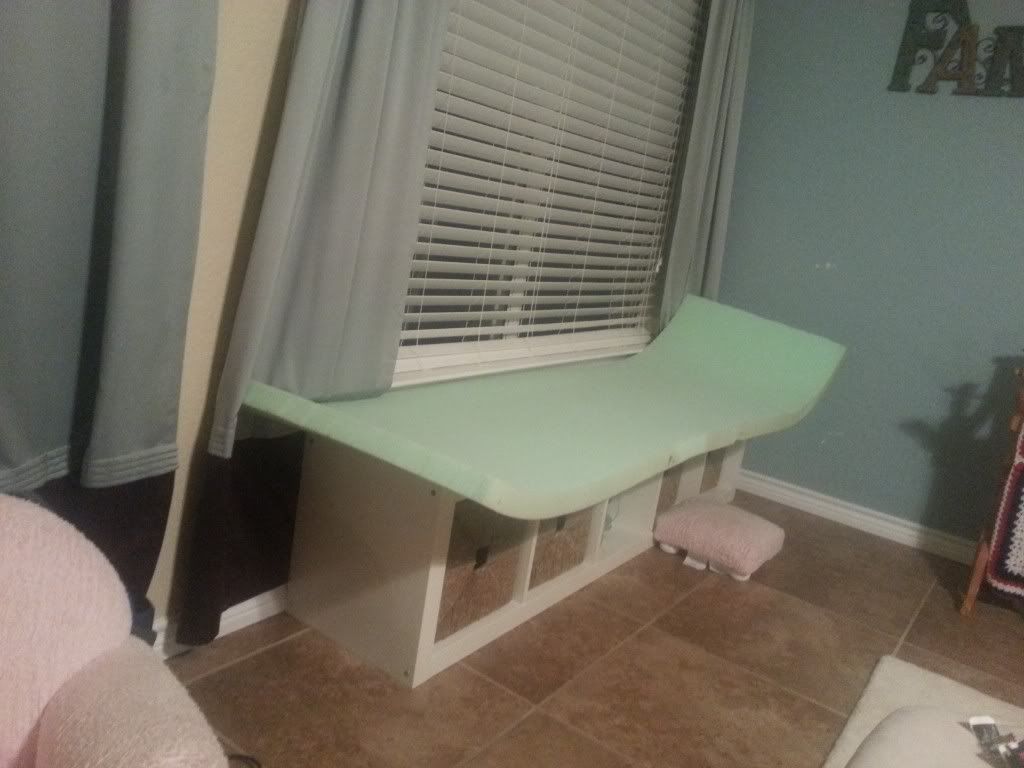
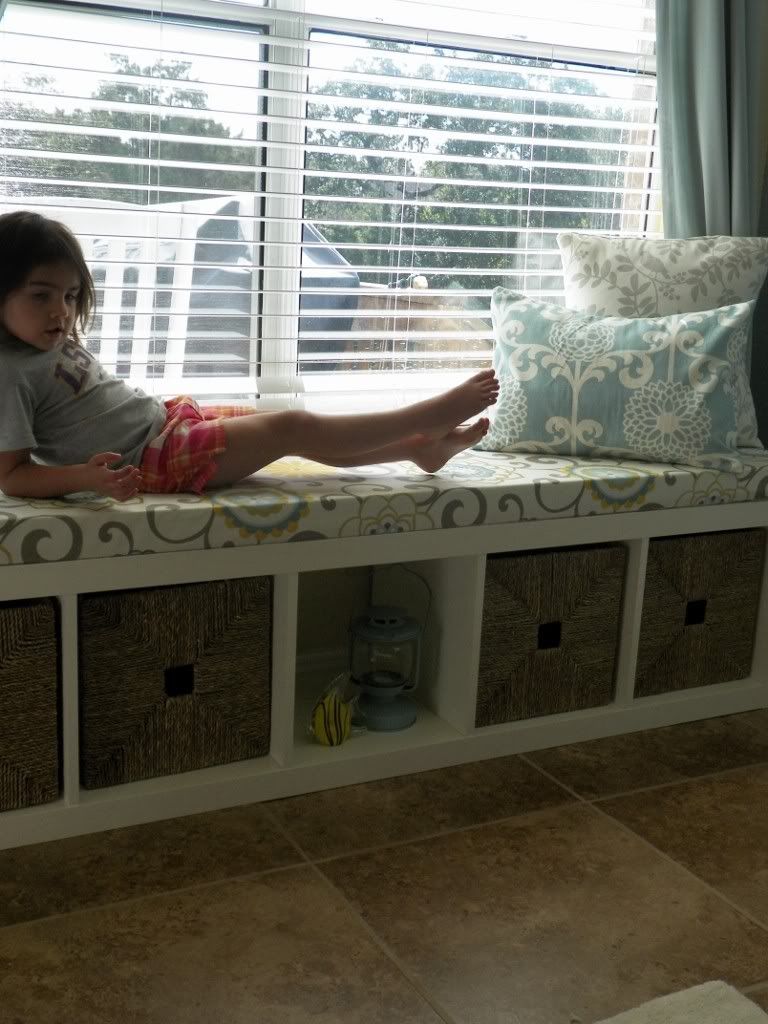
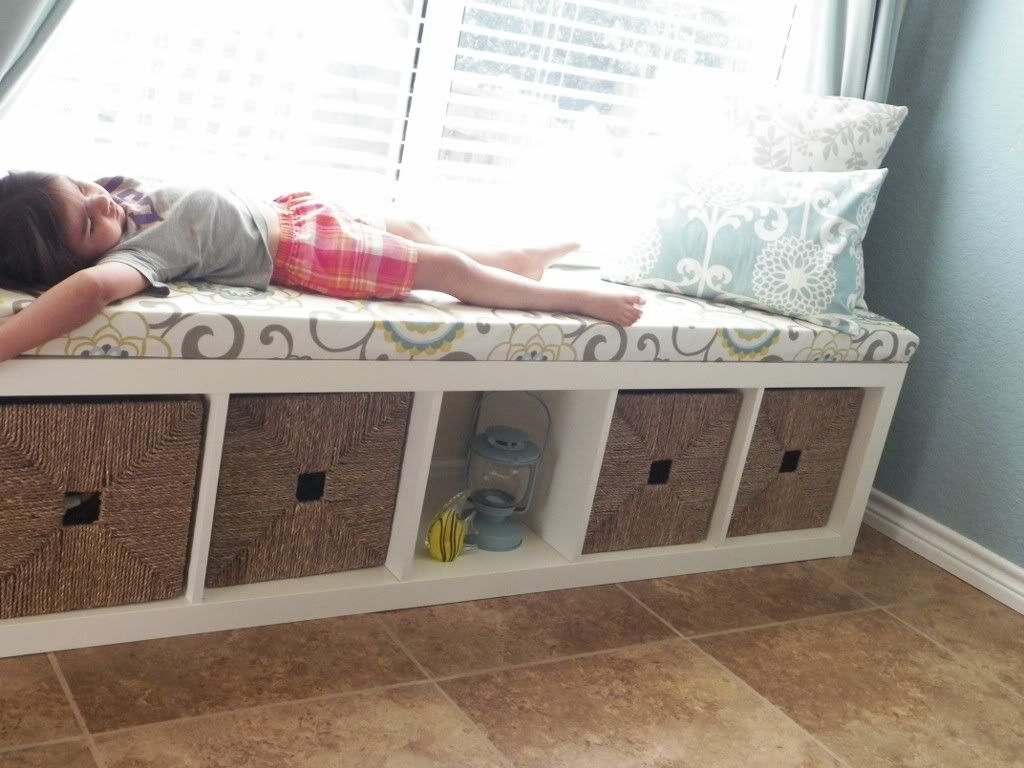
The 2" foam and mdf put it at the perfect height to fit under the window ledge:

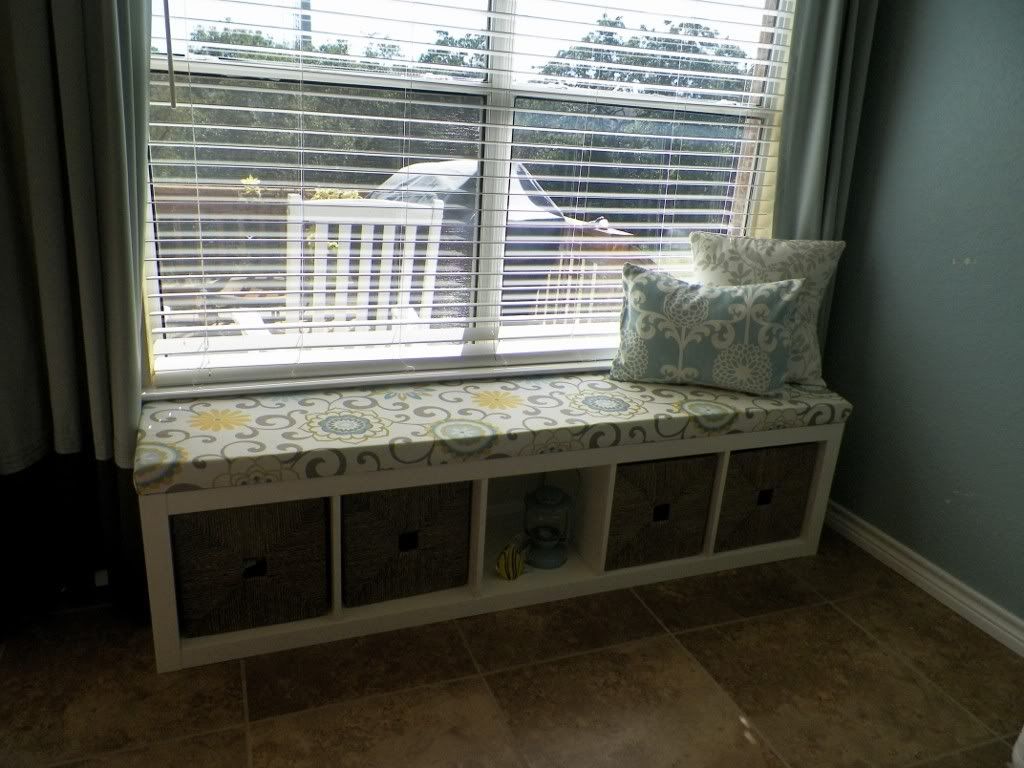
I'm in love with it:
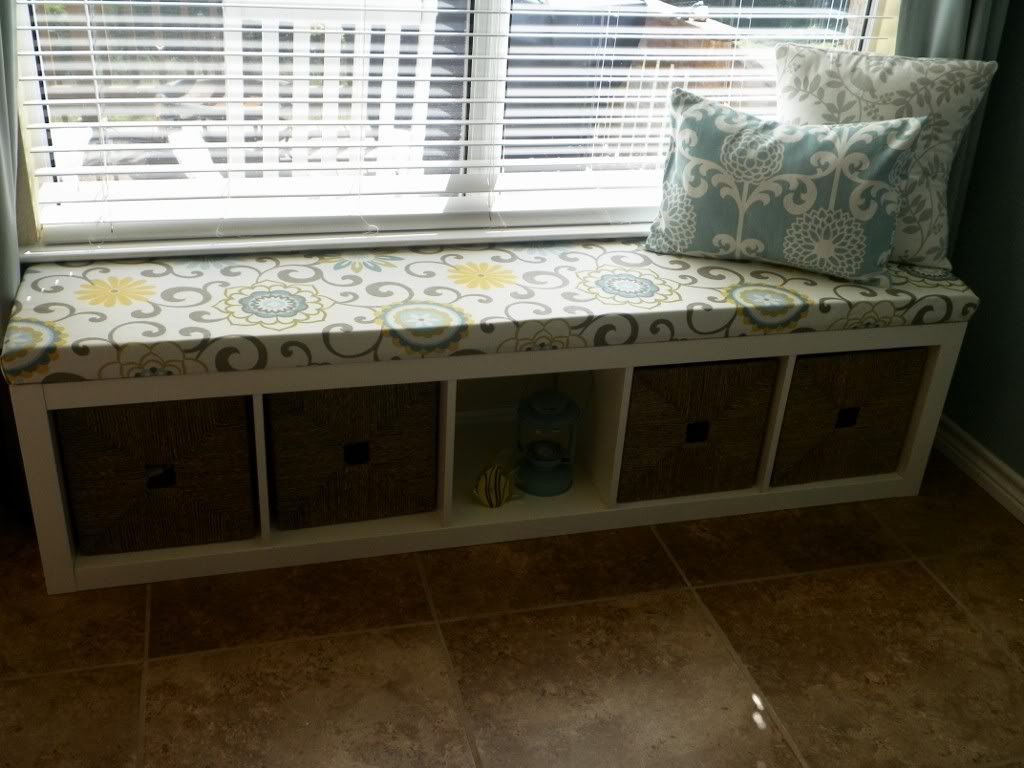
It was so much cheaper than the settee's I'd been eyeing and it can seat about 3 people, plus it provides tons of storage! What an added bonus!
I had planned on moving our dvd's over from the ottoman, but decided to use it for more toy storage. Yes, you read that correctly, toy storage. I normally don't allow toys in the living room because Eva has a toy section in the dining room, but she keeps bringing them over anyway. I figure instead of dragging all the toys back to the dining room every night, I can just stick them in these boxes.


I wasn't even finished taking pictures before Eva and her toys took over the space:

Do you think she likes it?
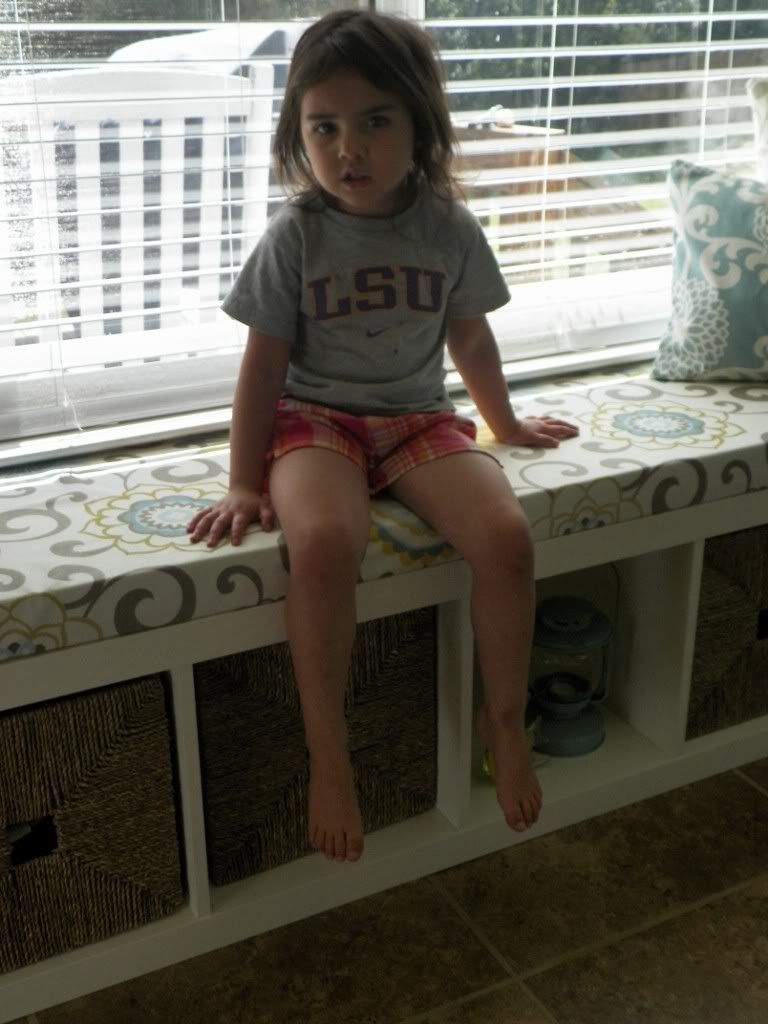
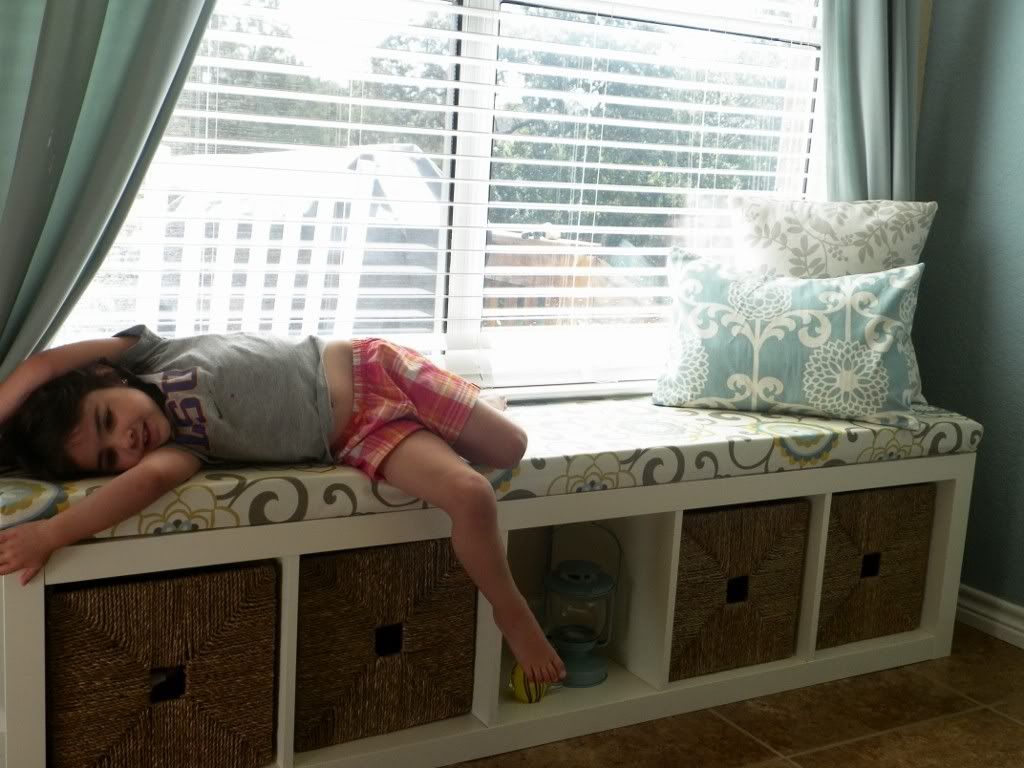

I think so!

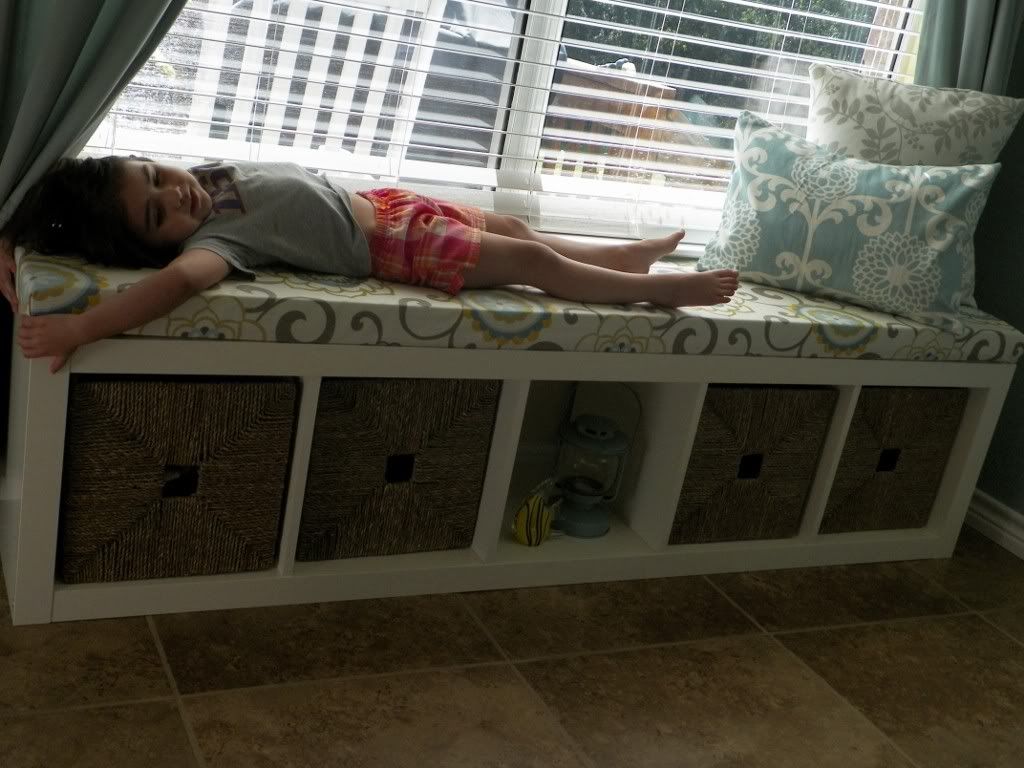
There you have it, a semi-DIY window bench from an IKEA expedit. It feels good to build something my daughter truly enjoys. While I like having pretty furnishings, the most important thing to me is that we have items we actually use. I foresee us spending a lot of time reading books and playing on this bench (It's very sturdy, in case you're wondering. Eva and I have sat on it together along with our two dogs).

What a great idea to use the bookcase from Ikea. I love your fabric choice for the seat. I did not know the foam is that expensive. Would love to have you join my weekly Wow Us Wednesdays party some time. Thanks for stopping by.
ReplyDeleteThank you so much! I think I may have linked up last week for the very first time. I'm still new to the link party idea. Ps, I love your blog!
DeleteFor some reason blogger is not letting me become a new follower. It says I am already one. I don't think so and yours is the second one today to do this.
ReplyDeleteThat is so strange! I've noticed it acting up lately. Yesterday it took me off as a follower of one of my favorite blogs. I had to go back and re-follow.
DeleteAmazing job, love the fabrics you chose and your little model makes it look so much better!
ReplyDeleteThank you! I think she'll be popping up on the blog a lot more. Every time I pick up my camera, she has magically found a way to work herself into the shot. I'm thinking it's no longer a coincidence and she just likes being photographed :)
DeleteAwesome! I love the window seat and this is a really great tutorial! Thanks for sharing!
ReplyDeleteThanks for stopping by, and I'm so glad you found it helpful :)
DeleteThat is brilliant!! I was going to use ikea slide out drawers for the kids storage in the basement and add a cushion, but actually attaching it like you did to the mdf is fabulous....I found you through Miss mustard seed. Thanks for posting!!
ReplyDeleteThank you for stopping by! The MDF definitely seems to make it more sturdy.
Deletehey your window bench really turned out pretty awesome! and your daughter definitely love it!!
ReplyDeletedropping by from Flaunt it Friday! come see me back at:
smart-momma.blogspot.com
huggies***
rea
Thank you! Your rope vases turned out great!
DeleteFound you at French Country Cottage - what a great job. I love the Ikea storage unit as a bench and the gorgeous fabrics you've chosen.
ReplyDeleteThank you so much for checking out the tutorial! It was a fun project...except for the part where I dropped the MDF on my toe :)
DeleteThat turned out really pretty. I have NOT seen that fabric at Joann's but i LOVE IT!!!! i'm gonna go hunting now. :)
ReplyDeleteWould love if you came and linked up with us. We’re giving away one free week of ad space for one lucky feature, and our blog gets thousands of hits per day! Hope to see you there!
http://www.oneprojectcloser.com/the-humble-brag-link-party-4/
Thanks for the tip! I went ahead and linked up. The fabric is on the bigger rollers that they usually keep near the back.
DeleteLooks great! It looks better with the center box decorated. It gives it visual interest :)
ReplyDeleteThank you, that makes me feel better about leaving it that way :)
DeleteLooks amazing!! I've started a project like this in my toddlers room, but all I've done so far is lie the expedit on it's side! You've given me the inspiration to get my butt into gear and finish it off :)
ReplyDeleteAwesome! You'll have to come back and share your results!
DeleteI featured your project this week at http://www.thevintagefarmhouse.com/2012/11/creative-things-thursday-features.html
ReplyDeleteThanks so much for sharing!
Wow! I'm so honored, thank you!
DeleteI agree with your daughter. That window seat is fantastic! I love your idea so much that I will be featuring it on OneCreativeMommy.com later today. Please stop by and grab a featured button if you’d like. I hope you’ll be back to share more great ideas at One Creative Weekend tomorrow. (I just shared this on my facebook page, too.)
ReplyDeleteHey Veronica, I was just commenting last night to let you know you had been featured. Be sure to grab a button - you deserve it! Also, you free ad just went up about 30 minutes ago! :) Thanks again for linking up!
ReplyDeleteAmazing, thanks again Jocie!
DeleteLooks so cute, I want one just like it!
ReplyDeletethank you!
DeleteHi there, I wanted to know how much fabric you used? It is lovely!
ReplyDeleteHi and thank you! I bought 3 yards to be safe, but I used less than 2.5 yards. The bench is narrow so you'll have plenty left over even if you use a 54" wide fabric.
DeleteI too have been eyeballing these benches to get our playroom organized. I was wondering what skill set I would need to complete this project and you made it look super easy! Thanks for the inspiration!
ReplyDeleteThank you, it really was pretty easy. I am by no means skilled at building anything, so I would rank myself as a beginner and I was able to put it together by myself. I think as long as you can use a drill and measuring tape, that's really all you need since the MDF board can be cut for you for free at Lowe's or Home Depot.
DeleteI love this idea for the playroom. However, I have a quick question about the screws. How did you make sure it wouldn't poke through the cushion? Thanks!
ReplyDeleteThanks! It was 2" foam, plus about 1" thick MDF on top of the 2" width of the expedit, so I knew a 3" screw would only go through the expedit and MDF without poking through the 2" foam. I hope that makes sense :)
DeleteThis is an awesome idea
ReplyDeleteThank you!
DeleteThis is very nicely done! And thanks for posting all the dimensions! :) Btw what does the MDF do? Do you need to purchase the MDF or can you go without it? Can you just buy the foam and then place it on top of the bookcase itself?
ReplyDeleteThank you! You probably could just wrap the foam but you wouldn't be able to attach it to the base with screws, since people would get poked when they sat down! Maybe you could try velcro or some kind of glue?
DeleteI'm so ready to hop on that bandwagon and use the expedit. I've never thought about it that way before, but instead I was going to use 2 STUVA benches. I still might because if I got the drawer inserts, they would essentially cost the same. You did a great job!
ReplyDeleteThanks so much!
DeleteThis is awesome! I'd like to make these as built-in seats for a kitchen nook. Do you imagine this bench being sturdy enough to support the weight of a few grown men?
ReplyDeleteI think that's a great idea! I have a bay window in my eat in kitchen and want to do something similar, but the dimensions are all wrong. I would have to have it custom made :( The bench is extremely sturdy. I have had 3 people sit on it before without any issues. It seems as sturdy as a pre-made bench from a store would be. Hope that helps!
DeleteWow! Thanks so much for this tutorial! I am looking to redo our game room into a play room, and turn my window area into a reading nook, and this is PERFECT, both for storage for books AND seating!
ReplyDeleteThanks again!
Thanks! It will be awesome. I'm glad you liked the tutorial :)
DeleteFound your blog while googling for DIY Ikea storage. May I ask, why is the MDF needed for the bench? It looks good. Your daughter looks just like you. I can't imagine being a young widow. Thank you for your husband's service to our country.
ReplyDeleteThank you, Tammie. The MDF secures the foam cushion to the ikea base. It also allowed me to staple on my fabric instead of sewing a slip on cover for the cushion. You could skip it, but the surface of the ikea base is slippery so the foam would probably slide around unless you found a different way to secure it to the base.
DeleteHi! Thanks for posting the dimensions of the MDF and foam. May I ask why you decided on those? The posted dimensions on Ikea are 72 14/16 x 15 6/16 (a difference of 5/16 lengthwise and 1/16 depthwise). Is it important that the MDF be smaller than the actual Expedit? And when the foam is cut, should it be cut to the Expedit dimensions or to the MDF dimensions? Thanks so much!
ReplyDeleteHi, thanks for your comment. I honestly don't know why the dimensions online are different. I'm thinking I didn't go by what's on the website, instead I used a measuring tape and measured the top of the expedit once I had put it together. My MDF was not smaller than the expedit, it was a perfect fit, so I would say that you might want to measure yours and go off your measurements instead of what they have on their site. My MDF and foam were both cut to the measurements of the expedit so everything fits together without any empty space or hang over. I hope that helps answer your questions.
DeleteYes, it does! Thank you so much! :)
DeleteHi, thanks for the post and specific dimensions. Is there a reason you cut the MDF a little shorter than the original 72 7/8 x 15 3/8. Your room looks great. We're trying to do the same for our son's playrom.
ReplyDeleteHi, thanks for your comment. I honestly don't know why the dimensions online are different. I'm thinking I didn't go by what's on the website, instead I used a measuring tape and measured the top of the expedit once I had put it together. My MDF was not smaller than the expedit, it was a perfect fit, so I would say that you might want to measure yours and go off your measurements instead of what they have on their site. My MDF and foam were both cut to the measurements of the expedit so everything fits together without any empty space or hang over. I hope that helps answer your question.
DeleteI like the colors you use in your home. And I I'm definitely going to steal that home office idea
ReplyDeleteThanks Marissa!
DeleteI just followed your instructions and will be assembling all my pieces this weekend! I got the foam and fabric at Joann's during a 50% off sale. SCORE!
ReplyDeleteAwesome! Let us know how it goes!
DeleteI love these benches! I have heard of so many people making these. I need to get to it and do mine already. Thanks for the tutorial!
ReplyDeleteAlena | http://homebins.com/collections/storage-bench
Thanks Alena, I'm glad you liked the tutorial :)
DeleteHello! Good job on the bench. I'm considering this for making my own breakfast bench with the storage. About the overall height (Expedit + MDF + foam covered seat), do you think it's a good height for eating at a table? Was thinking to maybe use the Stuva which is slightly taller.
ReplyDeleteAlso, how has the Expedit endured from being sat on? Any sagging? I would think the MDF gives it a bit more structural rigidity to the top and spreads the load more.
Hi and thanks for your comment! The total height is 19.5", which is only an inch higher than my dining chairs, so I think it would be great for a breakfast bench. It has held up amazingly! There is no sagging whatsoever.
DeleteI went to IKEA website and they don't make this bookcase anymore, what is similar to this bookcase on their site. thanks!
ReplyDeleteI pinned this and was so excited to find detailed directions and everything. Thank you so much! The only problem I am having now is apparently IKEA discontinued the Expedit and replaced it with Kallax. Which is fine, they look very similar, but the new shelves are only 4 cubes instead of 5, making them too short to be used for a 72 inch window. I am so bummed. If anyone knows of anything else similar, please, let me know.
ReplyDeleteThat pillow with the grey bird is all over my house! It came as a set of crtains and valance from Fred's for only $6! I used it as the curtains on my kitchen island and as slipcovers for my sofa cushions. Its also covers a chair in my daughters room! So glad to FINALLY find some fabric to match it (waverly pom) beautiful!
ReplyDeleteLove that! I've been thinking about a window seat for my bedroom and might have to give this a try. Thanks for sharing!
ReplyDeleteGreat post. Keep it up. Thanks for advice. It is wonderful information for me.
ReplyDeletefurniture designer
customised furniture singapore
hotel furniture singapore
furniture supplier singapore
What bookcase did you purchase from Ikea for this project?
ReplyDeleteIkea expedit
DeleteHi! I'm so excited that I stumbled upon your bench! Which bookcase did you purchase from Ikea for this project?
ReplyDeleteIkea expedit
DeleteDo you feel like the bookcase could be sturdy enough to use as a dining bench? Ps it is GORGEOUS! I love your posts!
ReplyDelete