
Hi Everyone,
I feel like it's been ages since I've posted anything. Life has been keeping me busy and with the holidays coming up I've just been feeling a little out of sorts. Anyway, I thought I'd pop on here and share some photos from the reception. I will upload tutorials for burlap banners and cutlery holders in the next few days.
First thing's first, the wedding.
The wedding was moved up to November with short notice so our first concern was finding my sister a dress. She's 4 months pregnant so we weren't sure we'd find anything that would fit correctly. Fortunately, David's Bridal had some nice options to choose from.
The ceremony took place in a small chapel office on the river walk. I actually got a speeding ticket on the way there. (My sister was probably thinking, oh great, I'm gonna be late to my own wedding, lol.) We were only about 10 minutes late, which is pretty darn good considering weddings are always running late.
The chapel location was actually perfect because the river walk is a great place to take pictures.


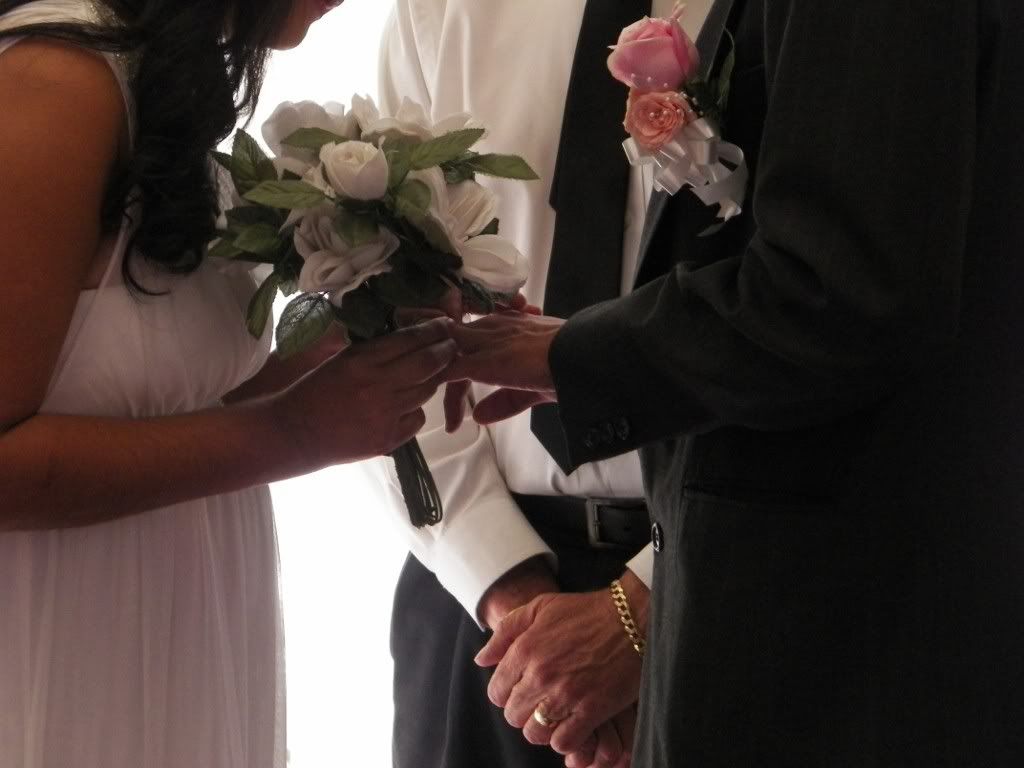
The ceremony was short and sweet. We forgot the wedding bouquet, but improvised by using some fake flowers from the chapel. They didn't let it ruin their day:

We were short on time because we had so much to do, but we managed to get pictures outside the courthouse and out on the river walk:


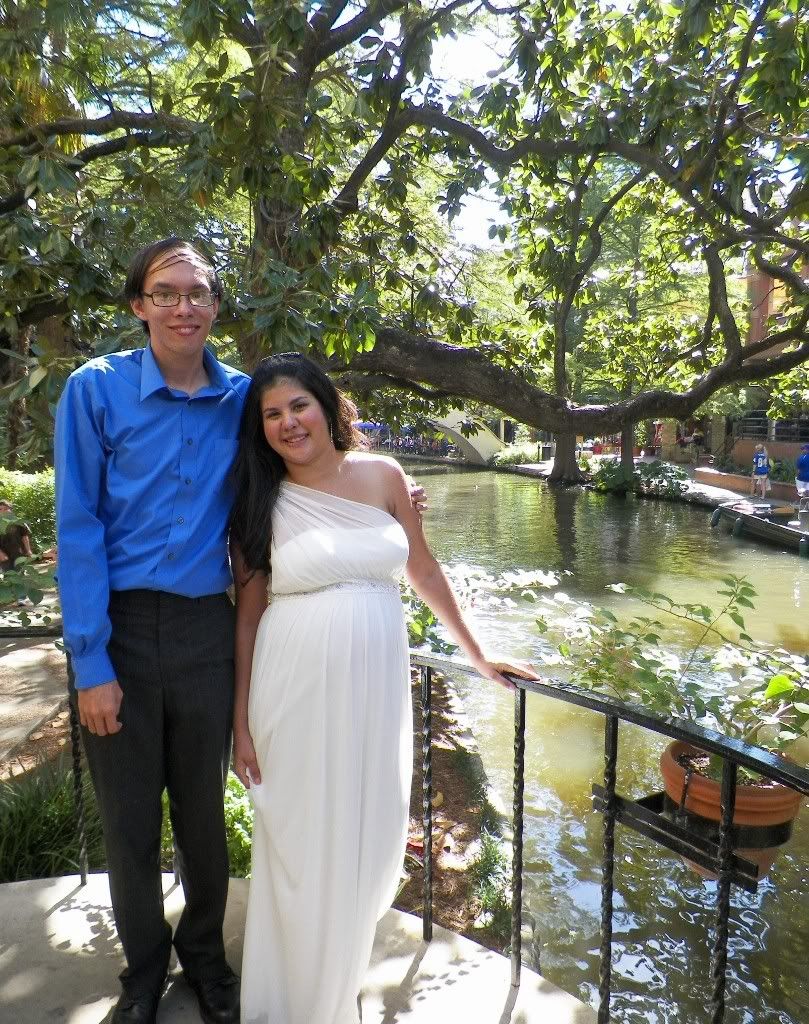


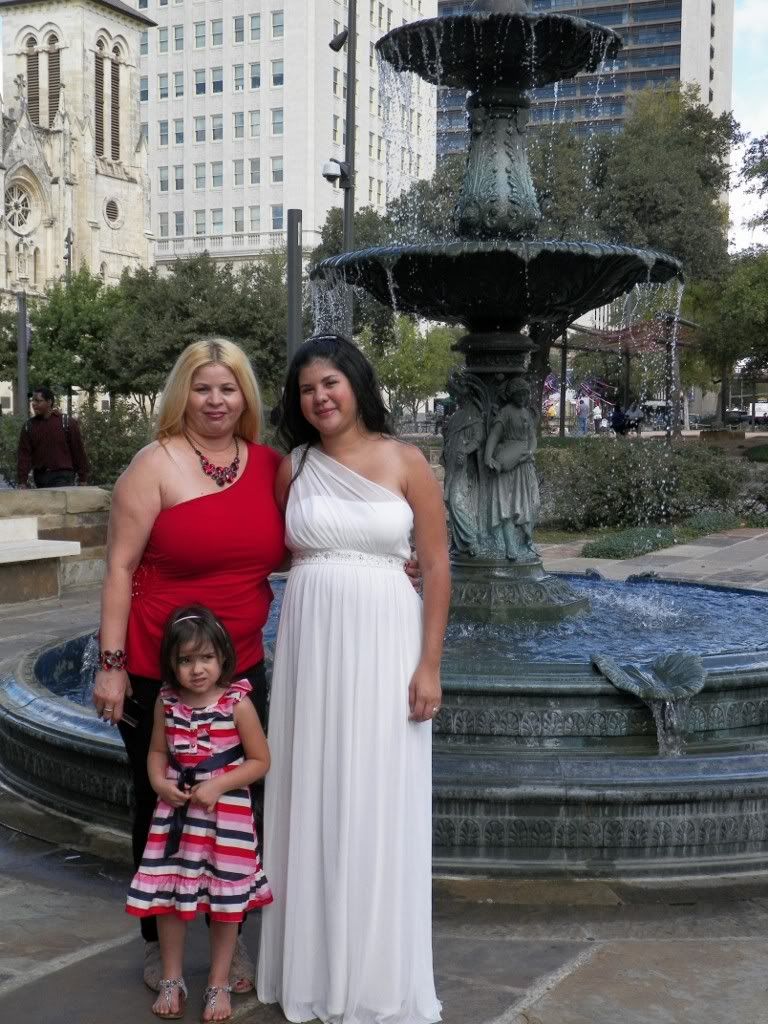

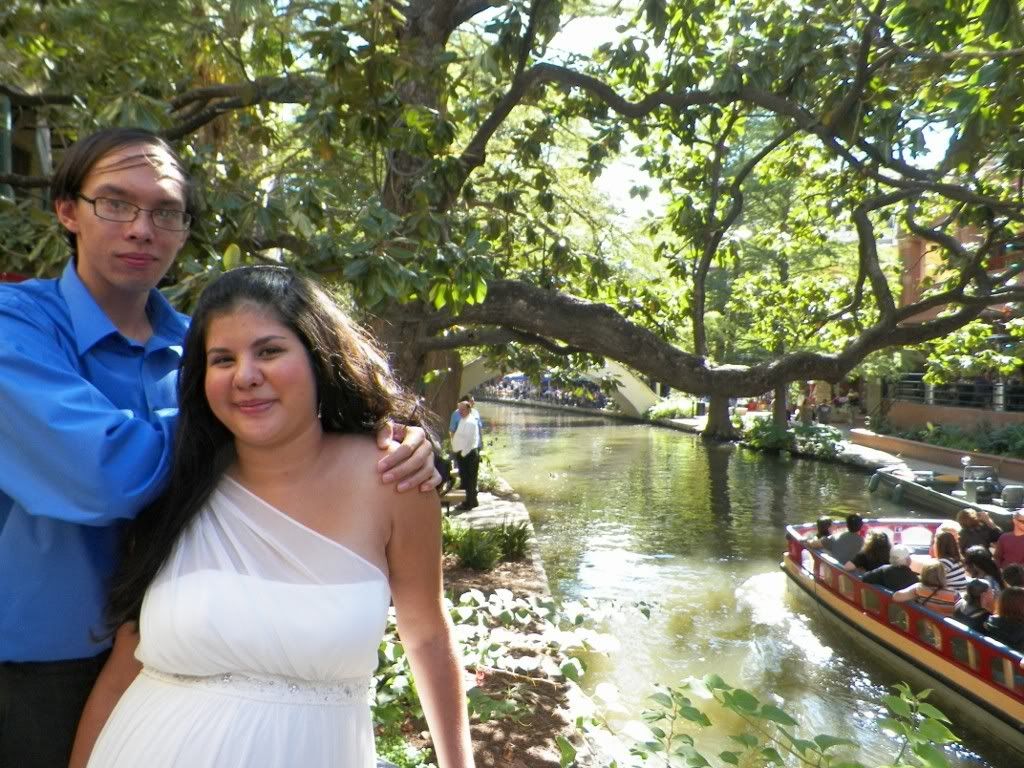
The chapel location was actually perfect because the river walk is a great place to take pictures.
The ceremony was short and sweet. We forgot the wedding bouquet, but improvised by using some fake flowers from the chapel. They didn't let it ruin their day:
We were short on time because we had so much to do, but we managed to get pictures outside the courthouse and out on the river walk:
My sister gave me total control of the reception so I planned it based on my own taste, while keeping in mind what I thought they might like.
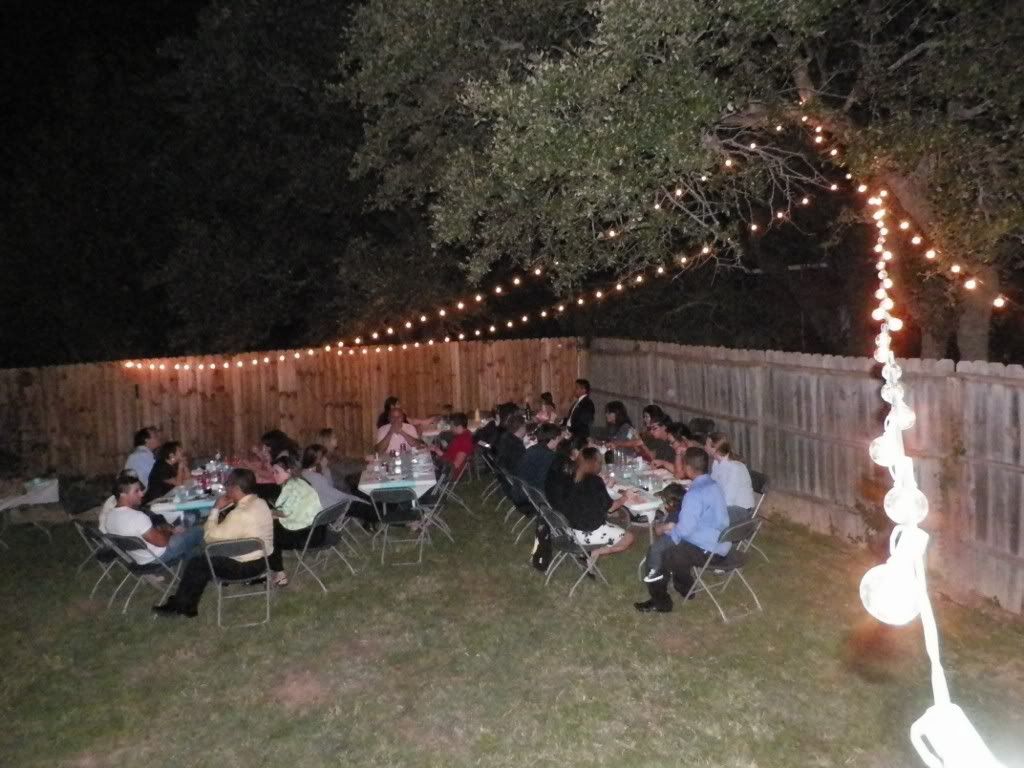
I had a week to plan the backyard reception so I was crazy busy picking up all the decor items. "The kids" as I like to call them, wanted to have the reception out on the deck, but when the guest list went from 28 people to 42+, it became obvious that there was no way we were gonna fit everyone on one side of the deck.
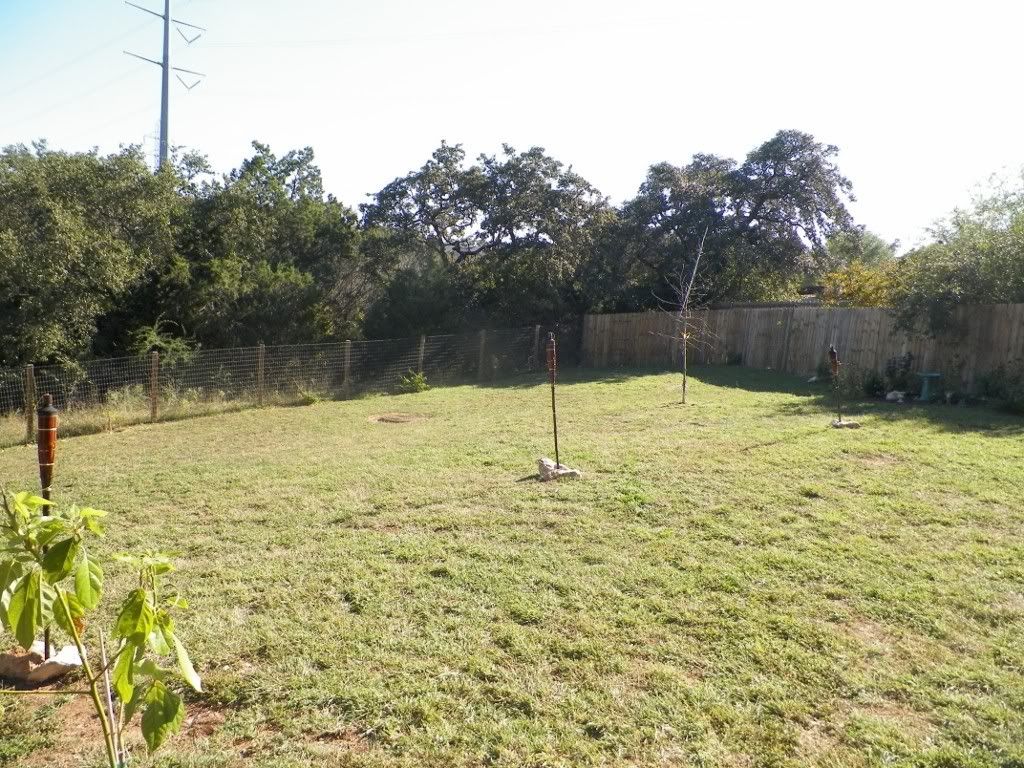
That's when I started stressing out. My backyard has a major slope to it, so where would we fit 7 tables and 50 chairs? We opted to try the flattest part of the yard near the veggie beds. It's still not super flat, but it was doable.
Then I worried about mosquitoes. Nothing worse than being swarmed by them while you're trying to enjoy an evening reception, right? Well, I found a product at Home Depot that worked perfectly. It's a bottle that attaches to your garden hose. All you have to do is turn on the water and water your lawn with it. As an added precaution, I purchased three tiki torches and filled them with an oil that contains citronella:
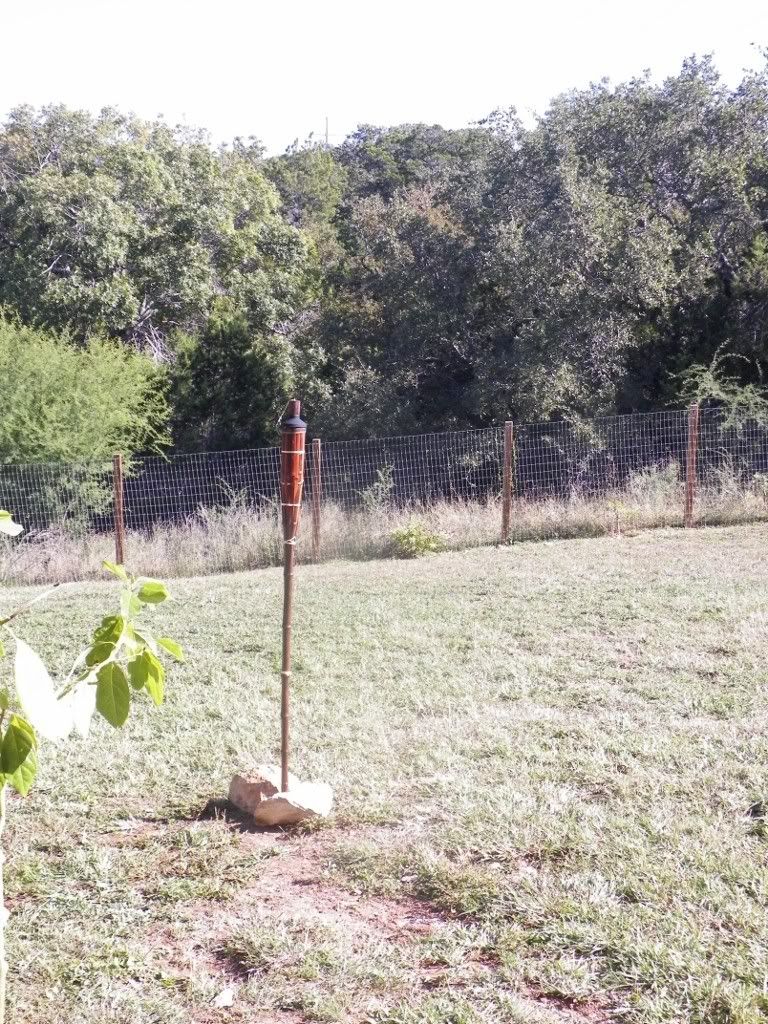
We were mosquito free all night, hooray!
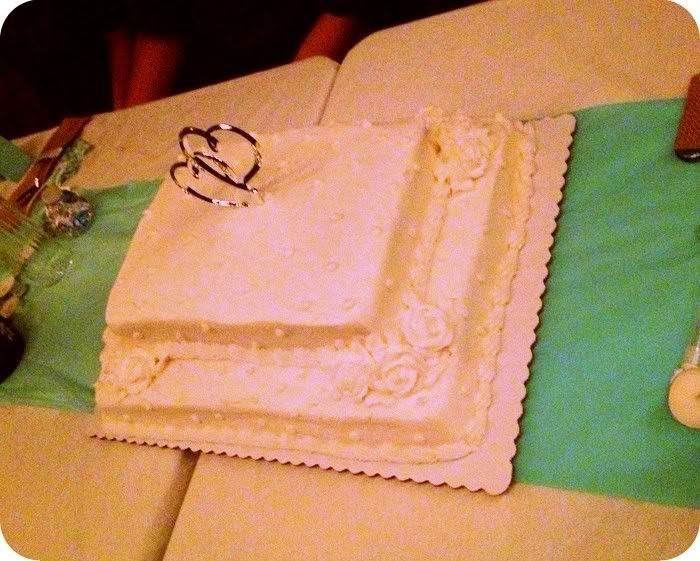
The tables, chairs, and margarita machine were rented by the groom's parents. The food was catered from Rudy's BBQ. The cake was a gift from a friend of the groom's parents:
I made cupcakes and my own butter cream frosting, just in case people wanted to pick something sweet up before or after the cake. I used a teardrop tip to create a butter cream rose for each.
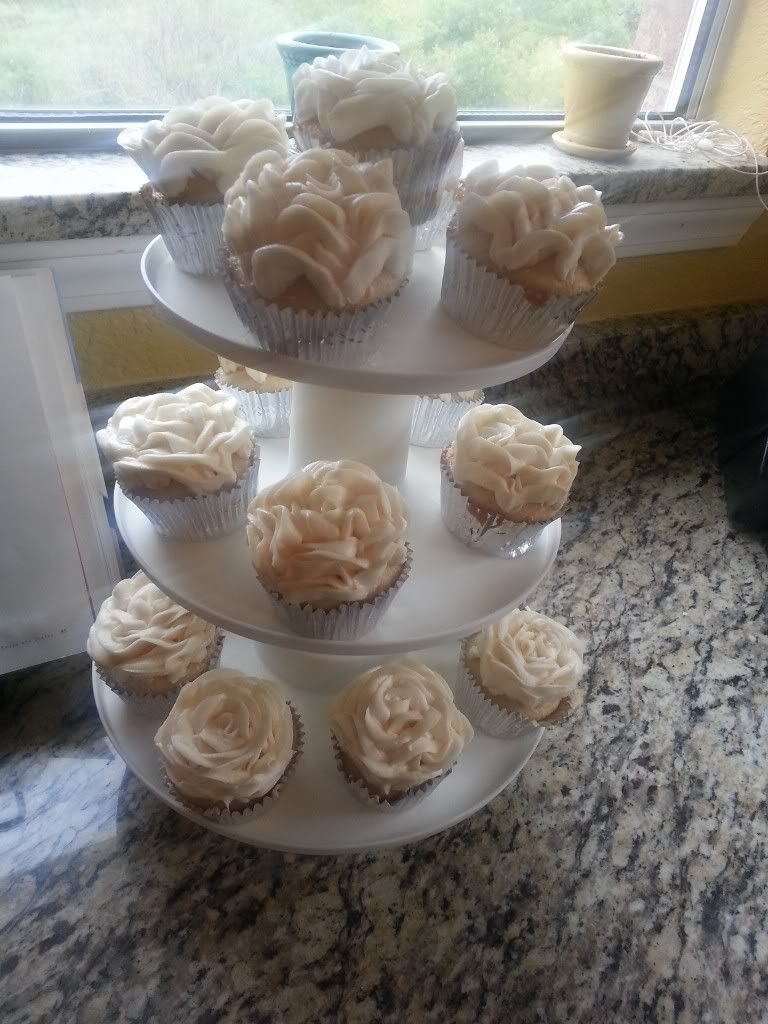
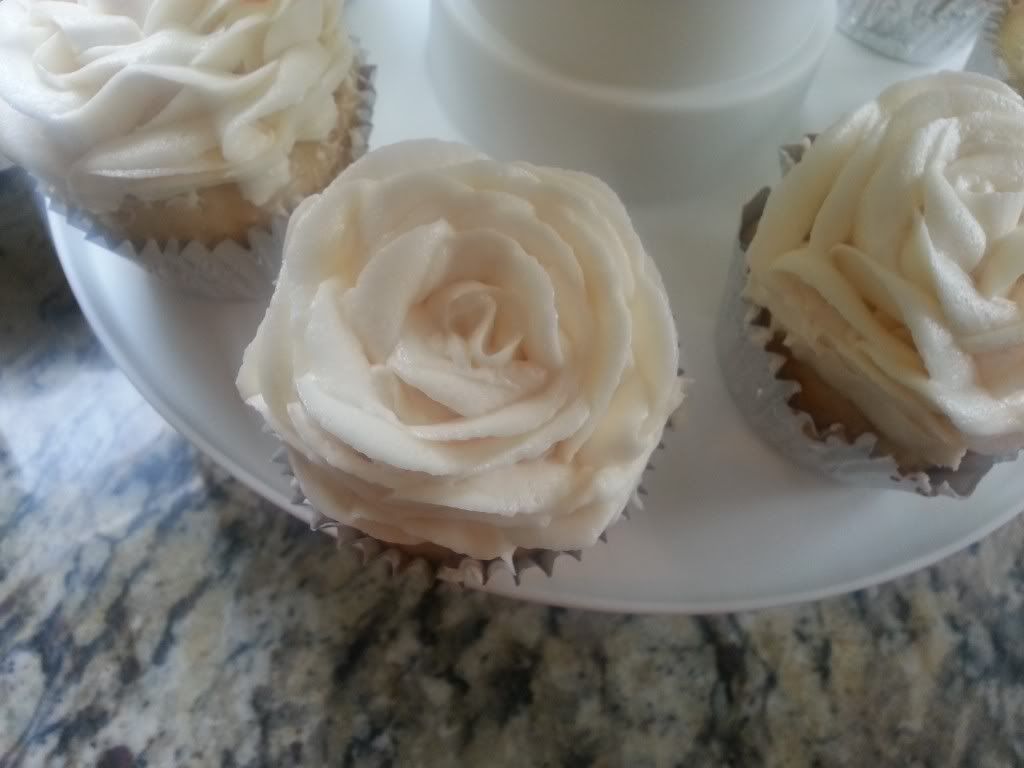
I made cupcakes and my own butter cream frosting, just in case people wanted to pick something sweet up before or after the cake. I used a teardrop tip to create a butter cream rose for each.
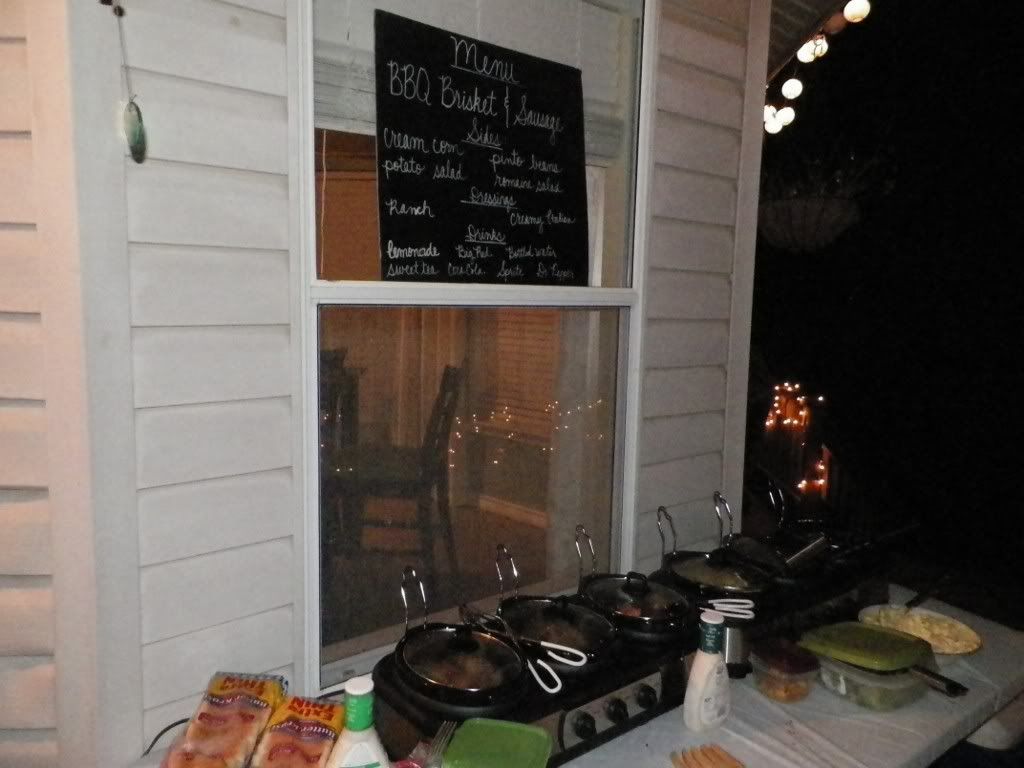
Knowing we'd have everything catered instead of cooking made planning the reception much easier. All we really needed to worry about was a good setup and making sure we had enough lighting.
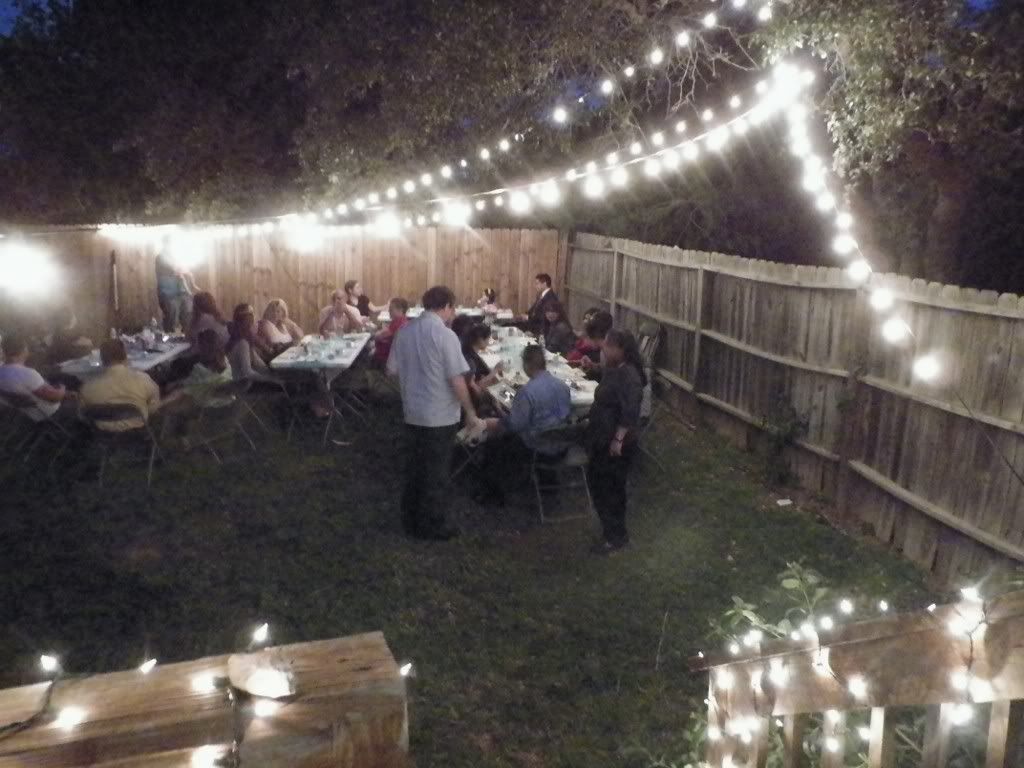
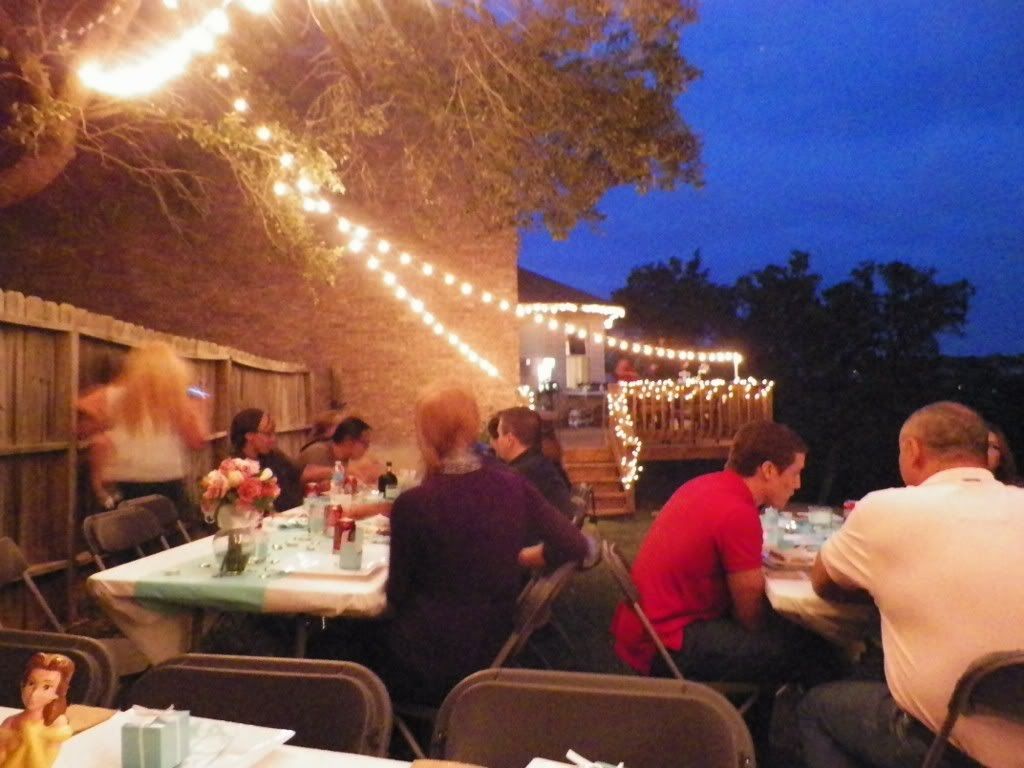
For lighting, I purchased 4 strands of these lights from World Market:

We strung them up in double strands from the deck to a tree, and from the tree to the privacy fence.

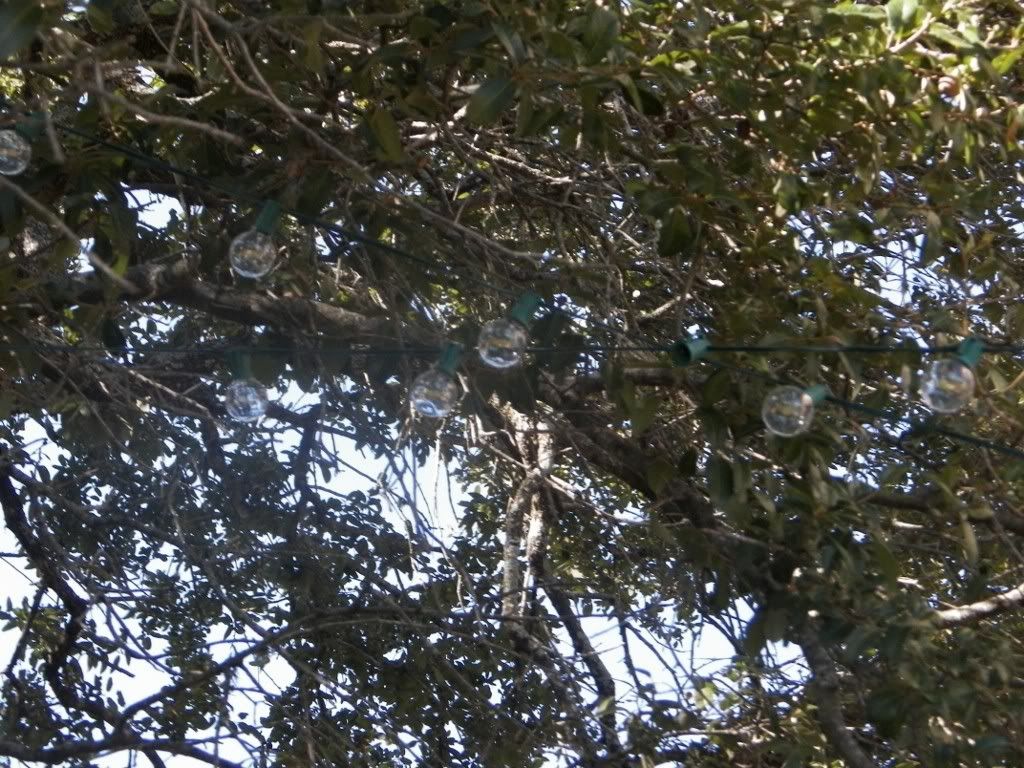
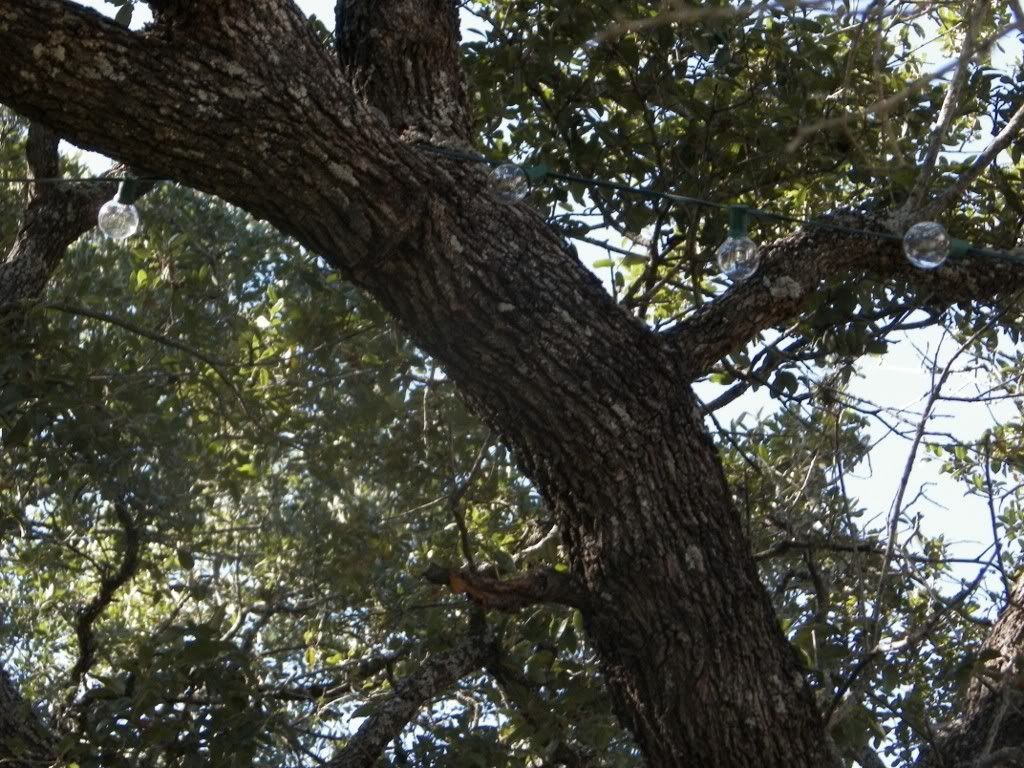
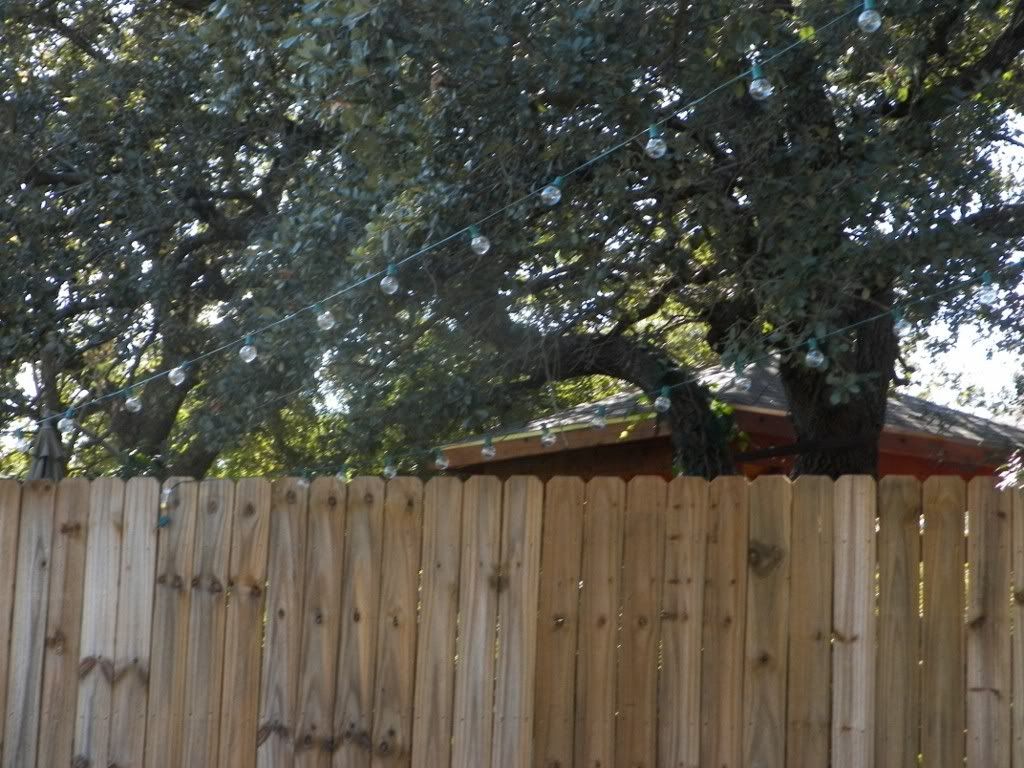
It was more than enough lighting, which was great because the day was so windy, that none of the candles on the table would stay lit:
It was more than enough lighting, which was great because the day was so windy, that none of the candles on the table would stay lit:
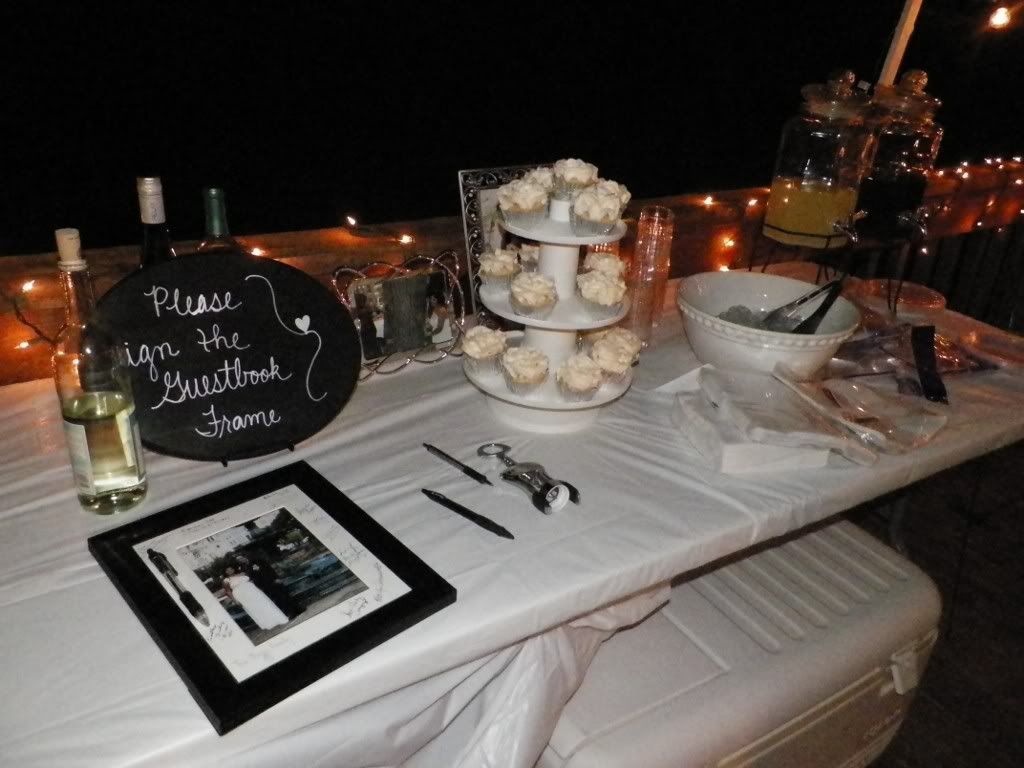
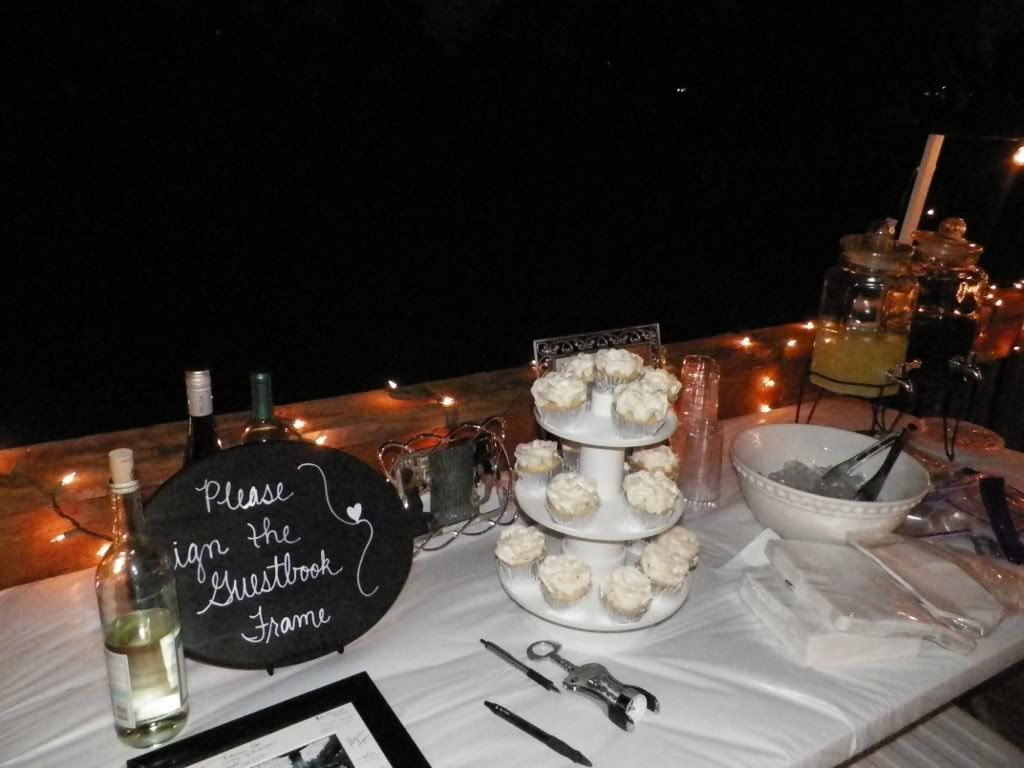
On the deck, we set up a food table next to the margarita machine and across from it, we had the drink table with wedding day pictures:
The wedding ceremony was family only, so I thought it would be a nice idea to set up pictures so that everyone could see what they looked like in their gown and suit:
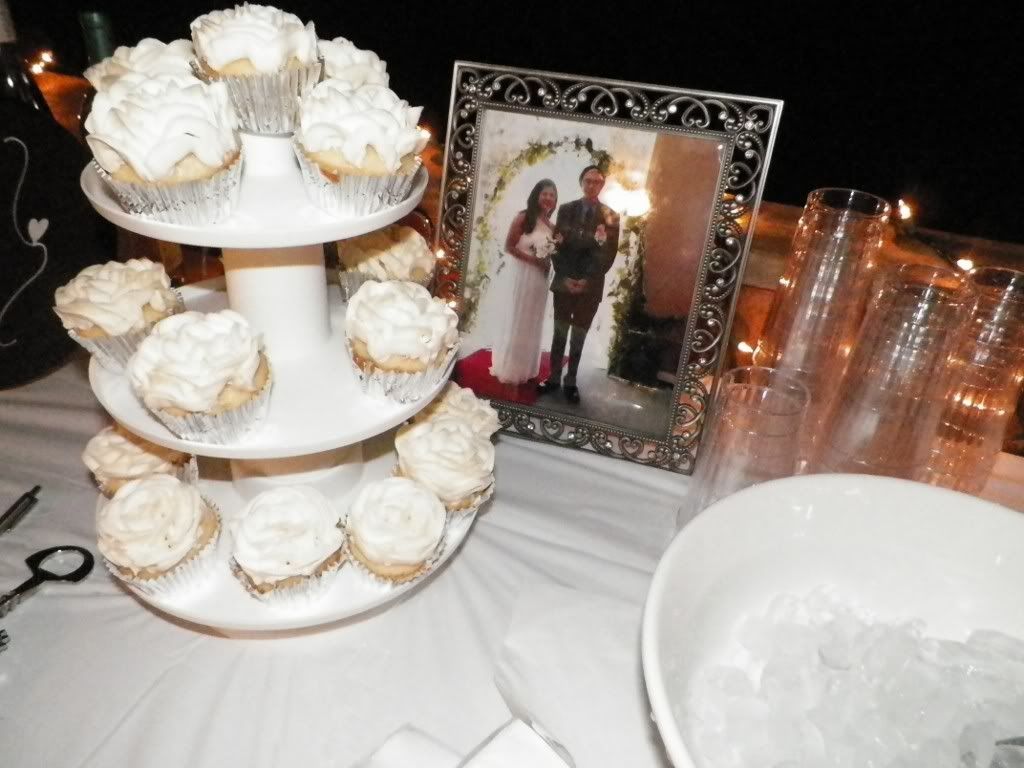
The wedding ceremony was family only, so I thought it would be a nice idea to set up pictures so that everyone could see what they looked like in their gown and suit:
My sister did not want a traditional guest book, so I suggested we do a guestbook frame that everyone could sign. Instead of paying $60 for a pre-made one, we just picked up a mat and frame at Hobby Lobby for about $10.
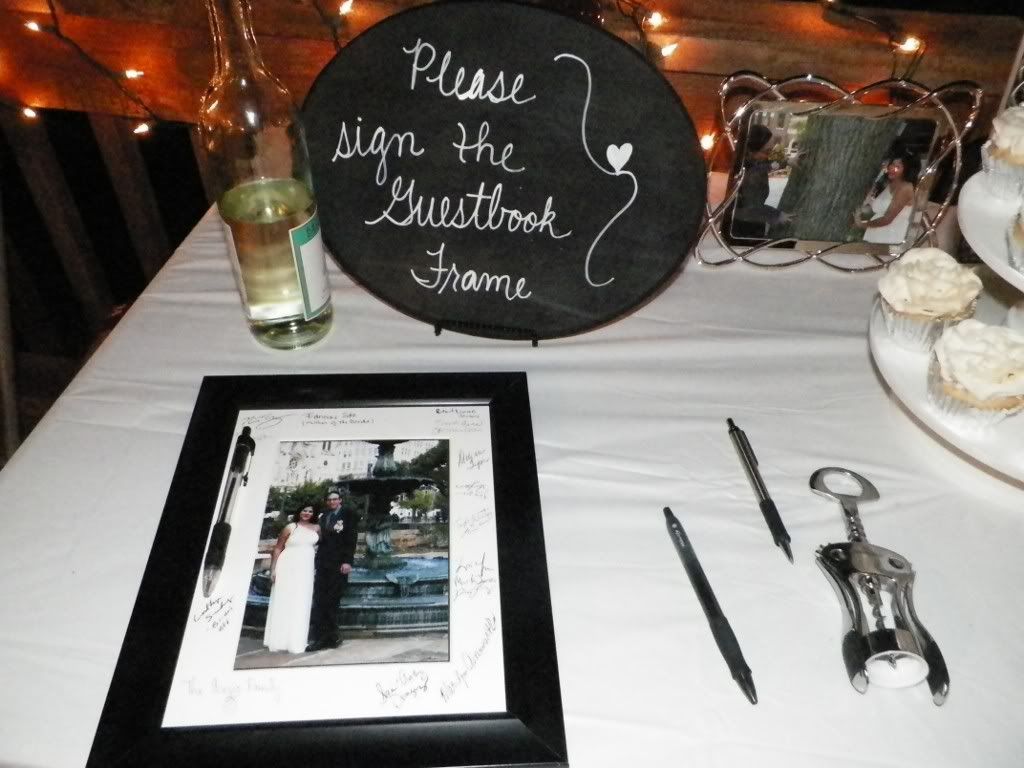
Then I used my chalkboard spray paint, a wood plaque, and a chalk marker to make a sign asking guests to sign the mat.
Then I used my chalkboard spray paint, a wood plaque, and a chalk marker to make a sign asking guests to sign the mat.
I also used chalkboard spray paint to make the Menu sign. Instead of splurging on a large piece of wood, I used a dollar store foam board, spray painted it, and wrote out the menu:
Since we set the food and drinks up on the deck, I had planned on hanging the sign above the food table, but it was way too windy for it to hang still. The groom's father suggested we place it inside the window, which worked out great:
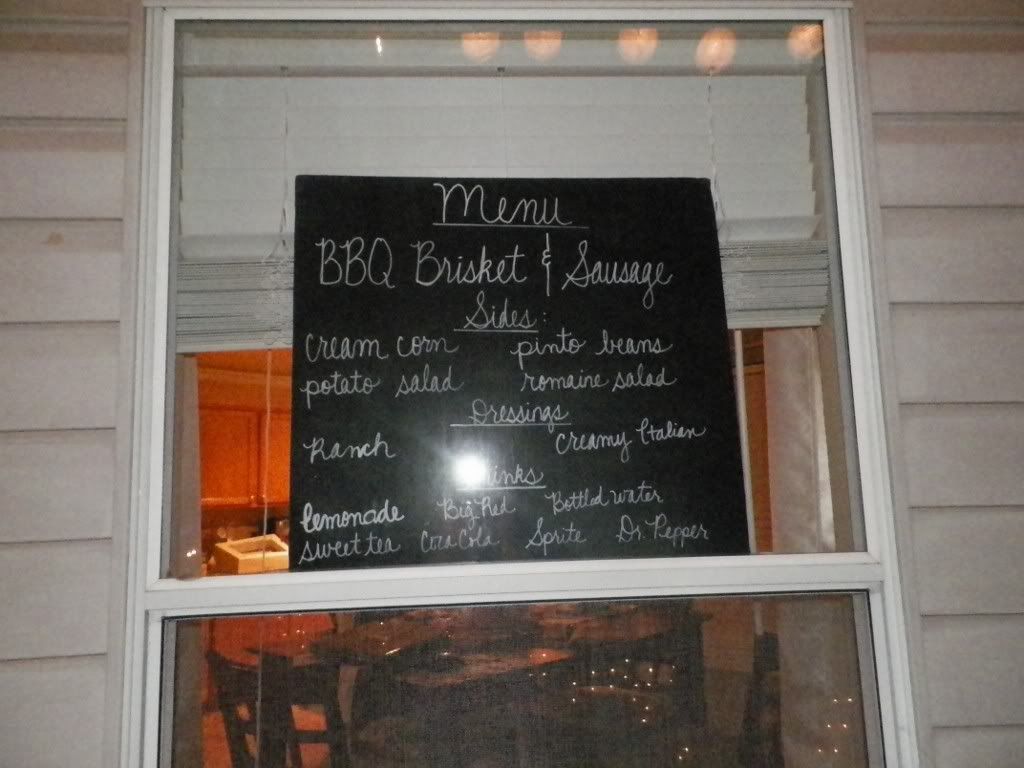
Since we set the food and drinks up on the deck, I had planned on hanging the sign above the food table, but it was way too windy for it to hang still. The groom's father suggested we place it inside the window, which worked out great:
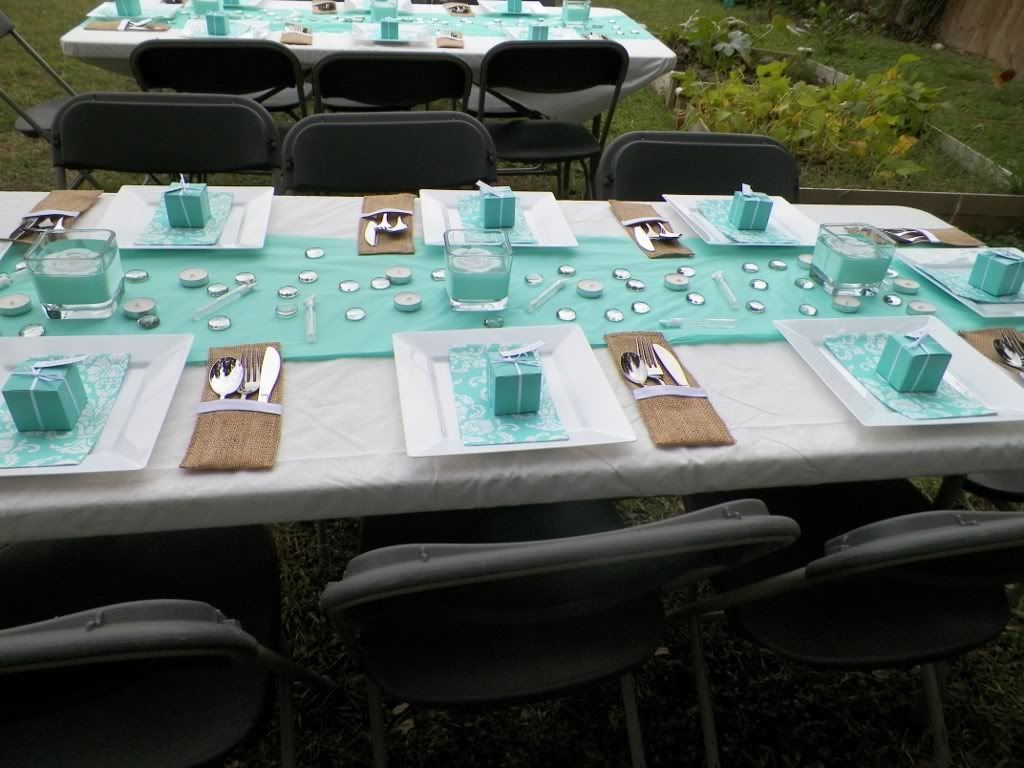
For the tables, we went with paper table covers from Party City. My mom and I then cut $1 vinyl table covers in half, folded them lengthwise, and used double sided tape to secure them to the center of each table.
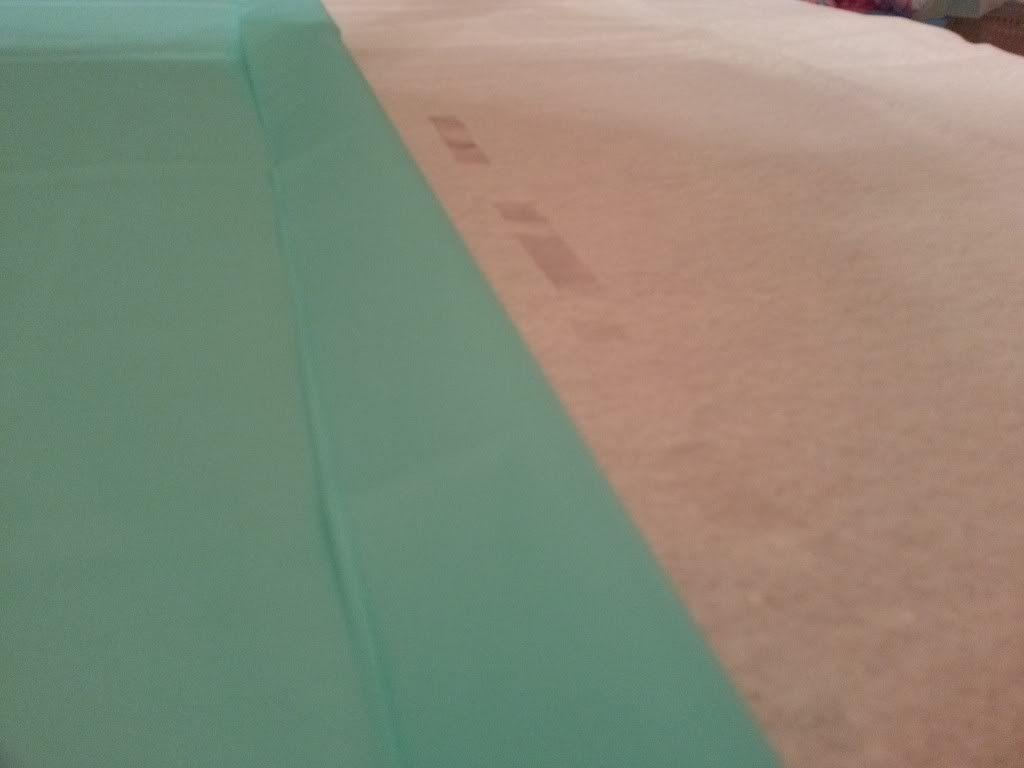
It created the illusion of a table runner and also added color to the tables.
It created the illusion of a table runner and also added color to the tables.
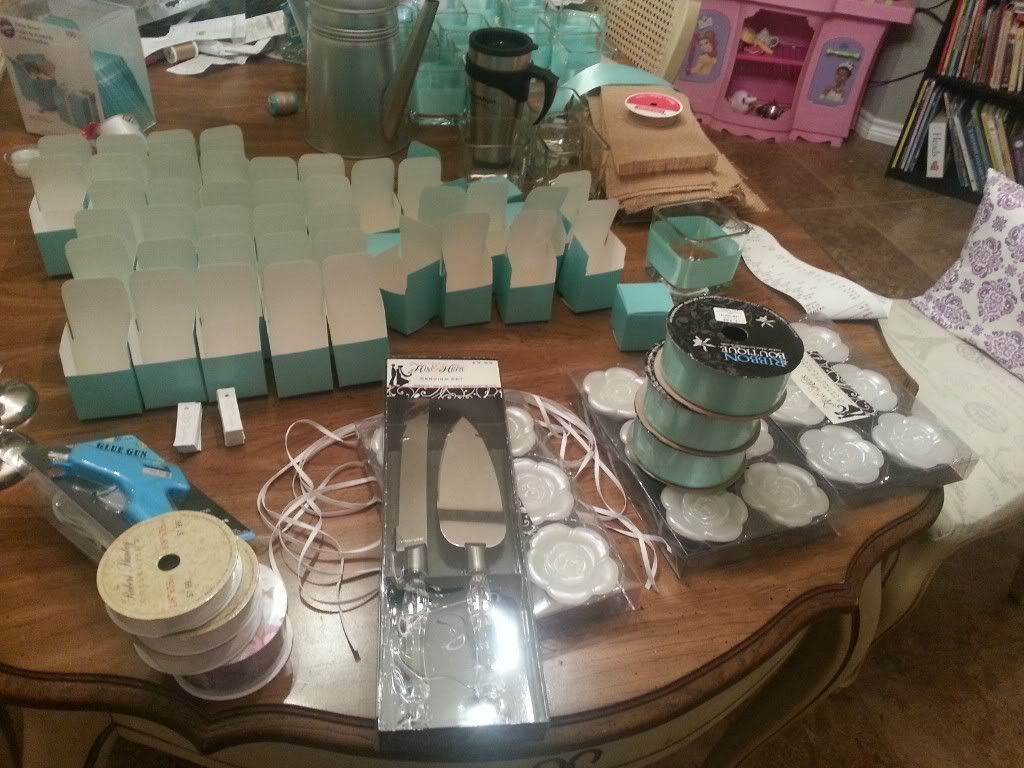
For the centerpieces, I went with square vases form the dollar store. I wrapped each in aqua ribbon and used hot glue to secure it. I purchased floating rose candles 50% off at Hobby Lobby. I already had tons of tea lights, and we scattered those down the runner. We also put out small wedding bubble tubes and clear stones (also from the dollar store).
It all looked adorable, which proves that you can make something nice without spending a fortune.

Unfortunately, I didn't have time to make the burlap bows for the chairs :(
Unfortunately, I didn't have time to make the burlap bows for the chairs :(
For the place settings, I picked up square white plates and plastic utensils that had the look of real ones.
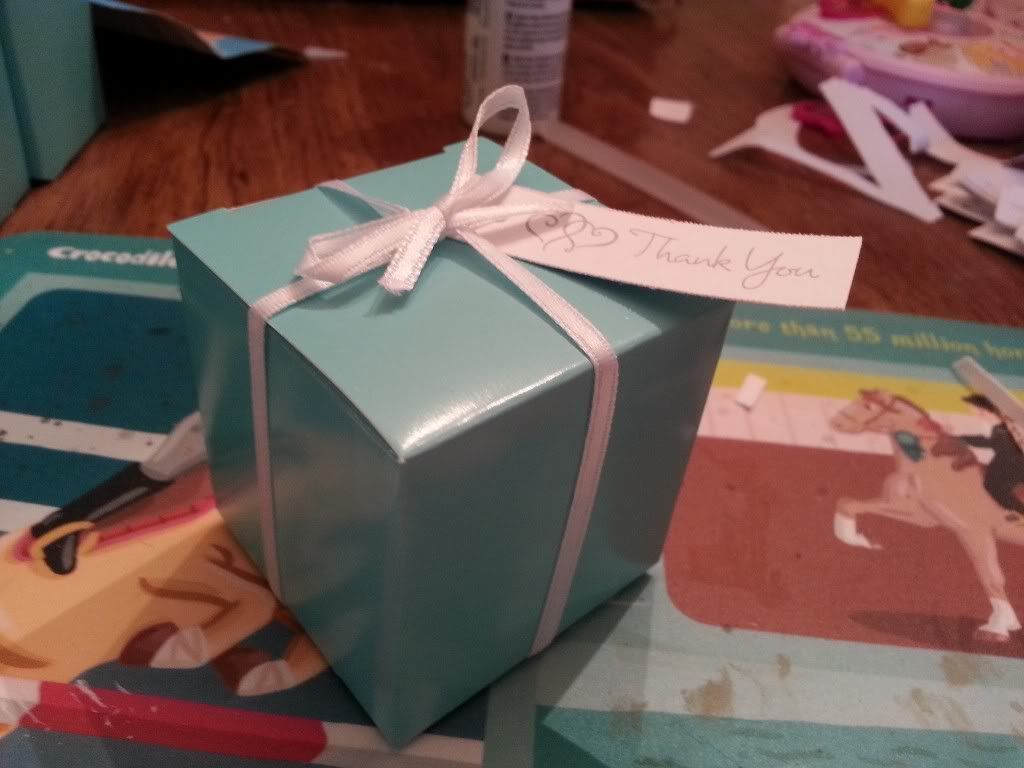
By chance, I found pretty damask aqua napkins on clearance. For each setting we put out a plate, topped the middle with a napkin, and a wedding favor:
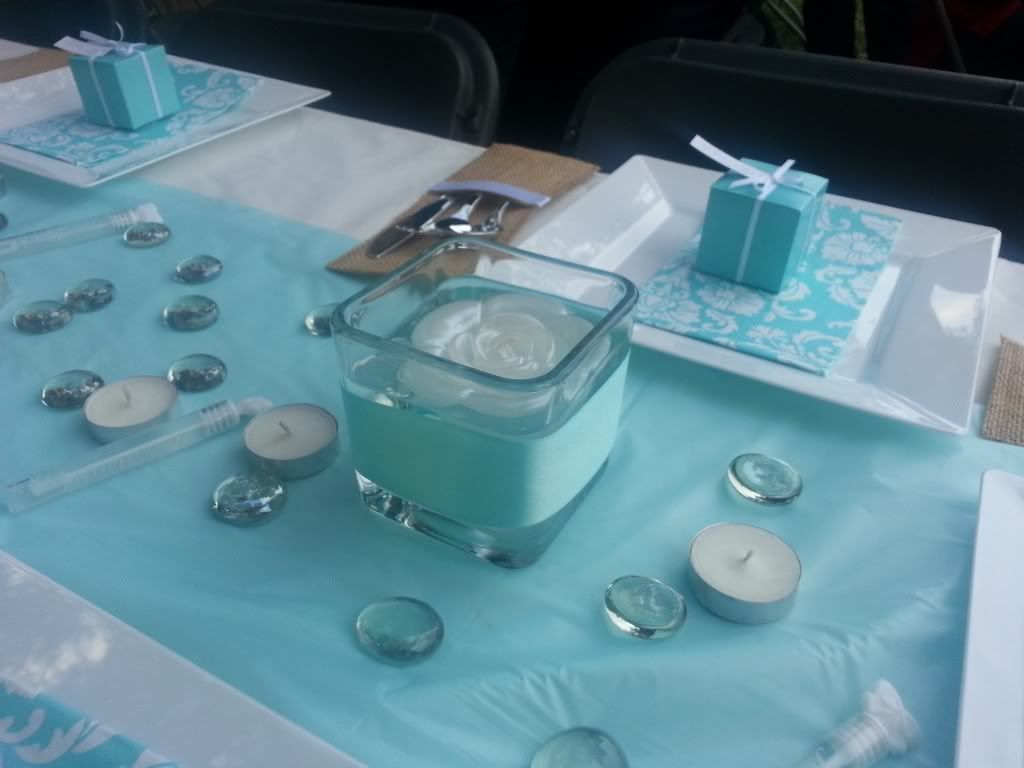
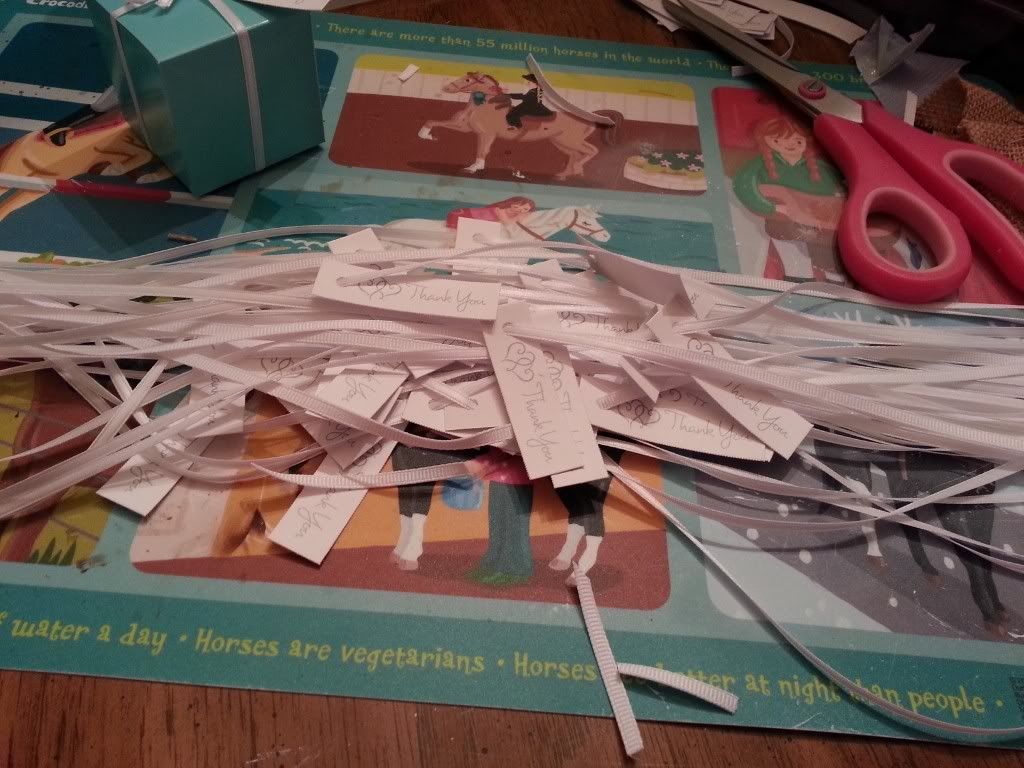
I found the favor boxes at Party City. We filled each with wedding almonds and mints. Then I wrapped each box with thin white ribbon and a 'thank you' tag from Michael's.


Next to the plates, we set up the utensil holders, which we had preloaded with utensils the day before:
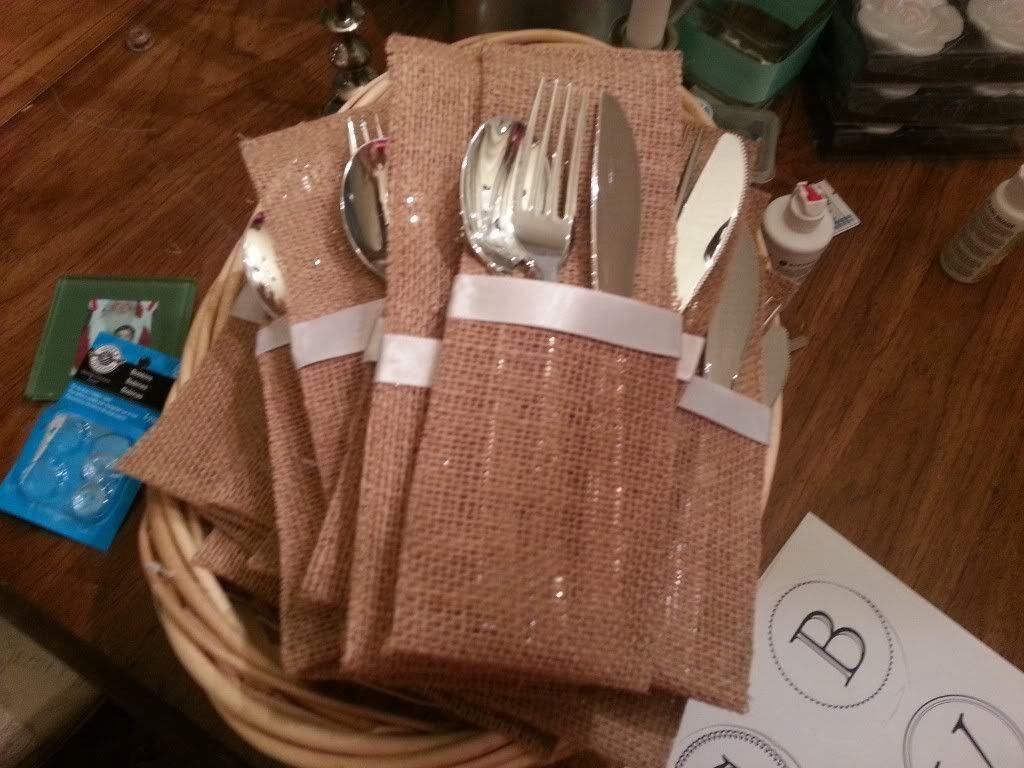

Next to the plates, we set up the utensil holders, which we had preloaded with utensils the day before:
The cups were left on the drink table so people could grab them as needed:
I used burlap, my sewing machine, hot glue, and ribbon to create the cutlery holders. I will have a tutorial up soon.
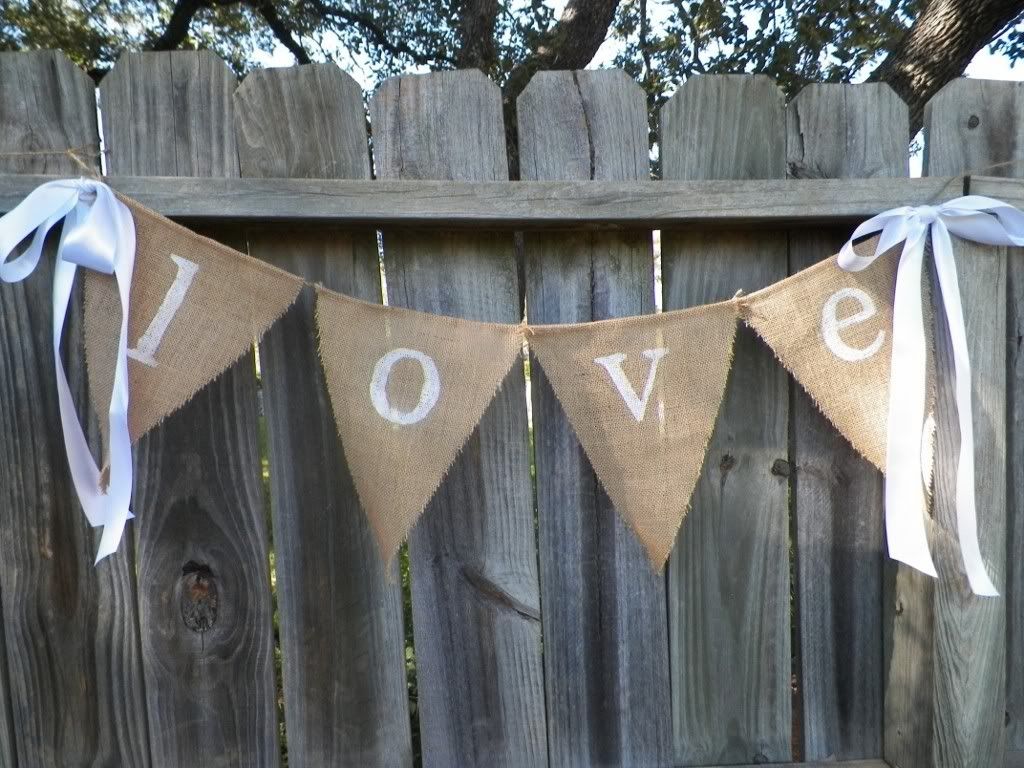
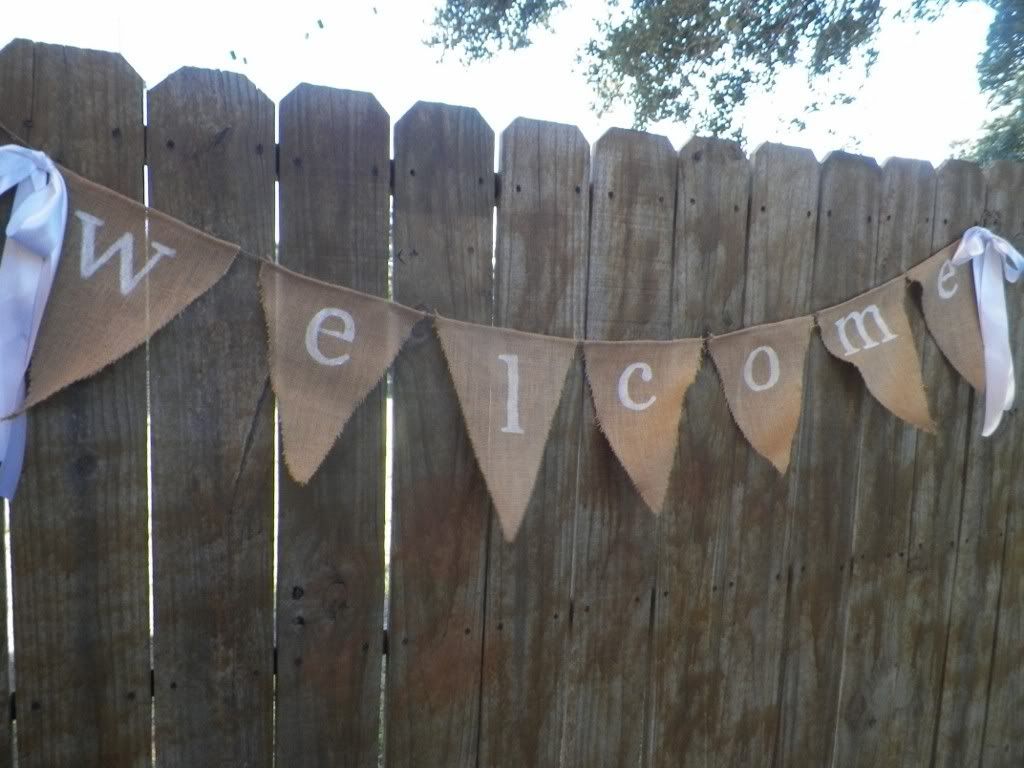
I also used burlap to create banners for the privacy fence.
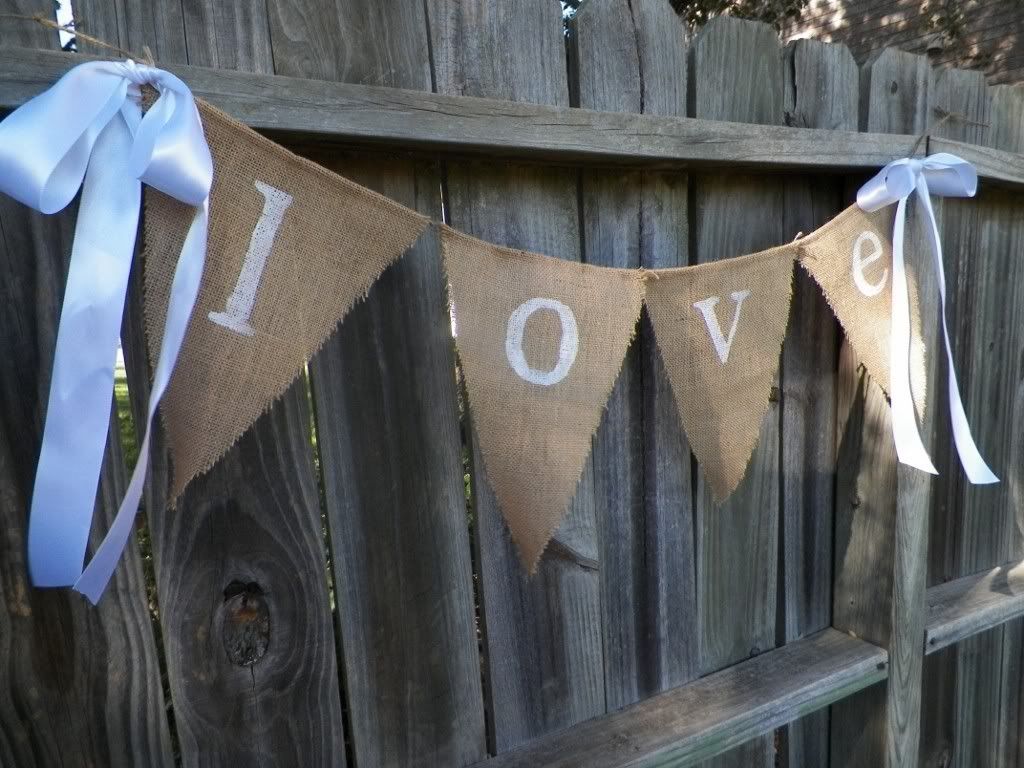
I made a 'welcome' banner and hung it next to the fence door, and I made a 'love' banner which hung above the bride's table.
There will also be a tutorial up soon for the banners.
I made a 'welcome' banner and hung it next to the fence door, and I made a 'love' banner which hung above the bride's table.
There will also be a tutorial up soon for the banners.
I made chair labels for the bride and groom chairs out of aqua ribbon, square foam, cardstock, and paper, but it was so windy that the darn things wouldn't stay on. I didn't do a tutorial for them since we didn't use them, but they looked similar to this:
 source
I came across this photo on Pinterest. Actually the ideas for a menu, burlap banners, and cutlery holders all came from Pinterest. I saw things I liked, and recreated them myself instead of going out and buying them pre-made. If you're planning a reception, Pinterest is a great place for ideas. We saved so much money by shopping at places like The Dollar Tree, Hobby Lobby, Michael's, and Party City. If you have more than a week to plan a reception, try buying things as sales come up. It's a great way to save.
I'd say the total cost for food, rentals, liquor, decor, materials, etc...was at or under $1500, which is not bad at all considering $400 of it was the catered food.
Overall the reception turned out beautiful (despite the wind, grrr!).
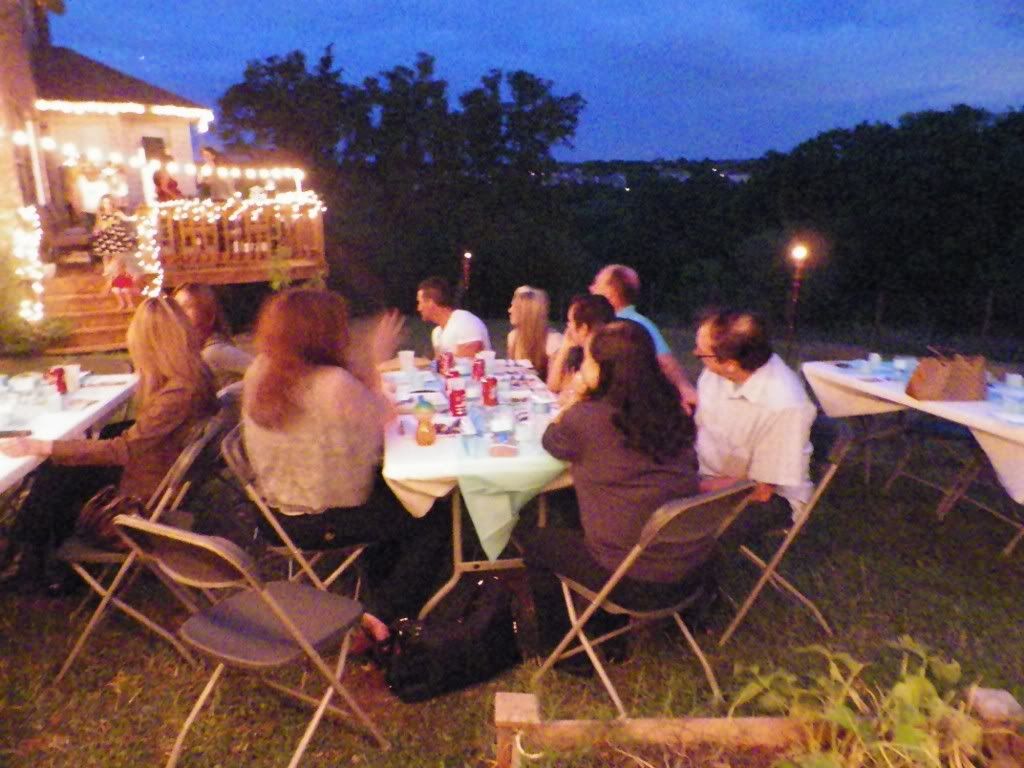
Everyone had a good time. They all left with full bellies and smiles on their faces, so I was a happy girl. I wish I'd taken more pictures, but I was so tired that I mainly sat with a friend, talking and relaxing :)
Everyone had a good time. They all left with full bellies and smiles on their faces, so I was a happy girl. I wish I'd taken more pictures, but I was so tired that I mainly sat with a friend, talking and relaxing :)
You did a fabulous job, Veronica. I don't know how you pulled it off on such short notice! Just beautiful!
ReplyDelete